8i | 9i | 10g | 11g | 12c | 13c | 18c | 19c | 21c | 23c | Misc | PL/SQL | SQL | RAC | WebLogic | Linux
Administrative Privileges and Job Role Separation in Oracle Database 12c Release 1 (12.1)
Oracle 12c includes additional administrative privileges to allow a greater level of job role separation if that is necessary in your organisation.
- 12cR2 Update
- Groups
- Creating OS Groups and Users
- Using Administrative Privileges
- Identify Users with Administrative Privileges (V$PWFILE_USERS)
12cR2 Update
Oracle 12c Release 2 (12.2) has added an extra group called SYSRAC, which will be included in the following sections.
If you are using Oracle 12.1, remember this group is not supported.
Groups
The documentation discusses the following groups.
Generic Name          OS Group    Admin Privilege   Description
====================  ==========  ================  =================================
OraInventory Owner    oinstall                      (Mandatory)
OSDBA                 dba         SYSDBA            Full admin privileges (Mandatory)
OSOPER                oper        SYSOPER           Subset of admin privileges

OSDBA (for ASM)       asmdba
OSASM                 asmadmin    SYSASM            ASM management
OSOPER (for ASM)      asmoper

OSBACKUPDBA           backupdba   SYSBACKUP         RMAN management
OSDGDBA               dgdba       SYSDG             Data Guard management
OSKMDBA               kmdba       SYSKM             Encryption key management

OSRACDBA              racdba      SYSRAC            Real Application Clusters management
Remember, if DBAs are the only people in your organisation that are allowed to manage Oracle functionality (databases, ASM, grid infrastructure etc.), these admin privileges are not needed. The only mandatory OS groups are "oinstall" and "dba".
Creating OS Groups and Users
If you have used a preinstall package, like "oracle-rdbms-server-12cR1-preinstall", to perform the prerequisites on Oracle Linux, the "oinstall", "dba" and "oper" groups will be created already. The other groups can be created manually as follows.
groupadd -g 54321 oinstall
groupadd -g 54322 dba
groupadd -g 54323 oper

groupadd -g 54327 asmdba
groupadd -g 54328 asmoper
groupadd -g 54329 asmadmin

groupadd -g 54324 backupdba
groupadd -g 54325 dgdba
groupadd -g 54326 kmdba

# 12.2 only.
groupadd -g 54330 racdba
With the groups in place, you can create the "oracle" user with the useradd command.
useradd -u 54321 -g oinstall -G dba,oper,asmdba,backupdba,dgdba,kmdba oracle
If the "oracle" user already exists, it can be amended using the usermod command.
usermod -g oinstall -G dba,oper,asmdba,backupdba,dgdba,kmdba oracle
The id command shows the current settings for the user.
id oracle
uid=54321(oracle) gid=54321(oinstall) groups=54321(oinstall),54322(dba),54323(oper),54324(backupdba),54325(dgdba),54326(kmdba),54327(asmdba)
Using Administrative Privileges
When you install the database software the "Privileged Operating System groups" screen gives you the ability to associate these groups withe the relevant privilege.
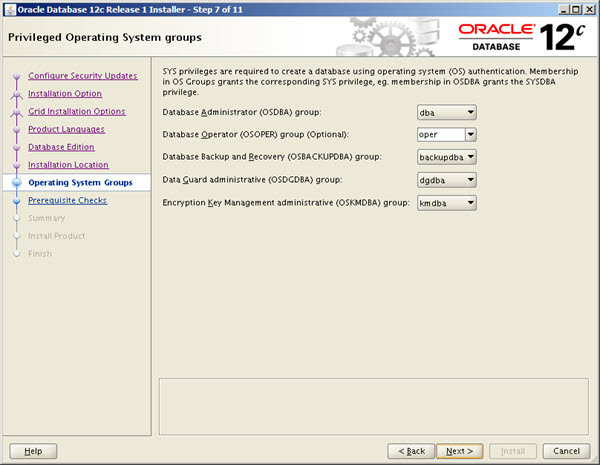
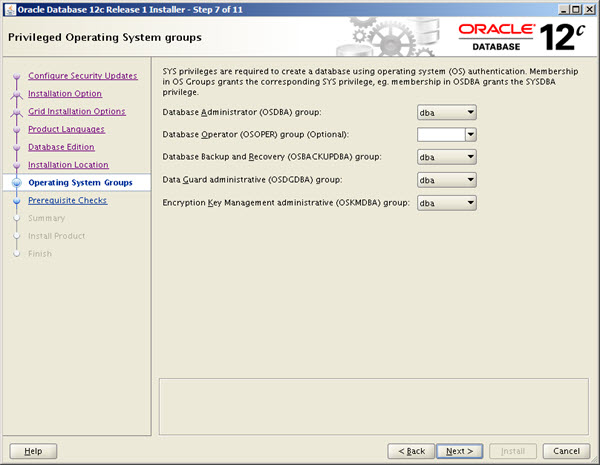
Remember, this is optional. There is nothing wrong with using something like the following if it suits your organisation.
To allow a database user to connect using these admin privileges, you need to grant the relevant admin privilege to them. You can't grant sysrac to a database user.
GRANT sysdba    TO my_dba_user;
GRANT sysoper   TO my_oper_user;
GRANT sysasm    TO my_asm_user;
GRANT sysbackup TO my_backup_user;
GRANT sysdg     TO my_dg_user;
GRANT syskm     TO my_km_user;
The users will then be able to connect using the their admin privileges.
$ sqlplus my_dba_user as sysdba
$ sqlplus my_oper_user as sysoper
$ sqlplus my_asm_user as sysasm
$ sqlplus my_backup_user as sysbackup
$ sqlplus my_dg_user as sysdg
$ sqlplus my_km_user as syskm
$
$ # 12.2 only.
$ sqlplus / as sysrac
Identify Users with Administrative Privileges (V$PWFILE_USERS)
The V$PWFILE_USERS view allows you to quickly identify users with with admin privileges.
SELECT * FROM v$pwfile_users;

USERNAME                       SYSDB SYSOP SYSAS SYSBA SYSDG SYSKM     CON_ID
------------------------------ ----- ----- ----- ----- ----- ----- ----------
SYS                            TRUE  TRUE  FALSE FALSE FALSE FALSE          0
SYSDG                          FALSE FALSE FALSE FALSE TRUE  FALSE          1
SYSBACKUP                      FALSE FALSE FALSE TRUE  FALSE FALSE          1
SYSKM                          FALSE FALSE FALSE FALSE FALSE TRUE           1

SQL>
For more information see:
Hope this helps. Regards Tim...