8i | 9i | 10g | 11g | 12c | 13c | 18c | 19c | 21c | 23c | Misc | PL/SQL | SQL | RAC | WebLogic | Linux
Oracle Enterprise Manager Cloud Control 12c Release 4 Installation on Oracle Linux 5.9 and 6.5
Enterprise Manager Cloud Control is the new name for what was previously know as Enterprise Manager Grid Control. Depending on the source of the material, you may still see the product described as Grid Control. This article describes the installation of Oracle Enterprise Manager Cloud Control 12c Release 4 on Oracle Linux 5.9 and 6.5. (x86_64).
The repository database can be 11.2.0.3, 11.2.0.4 or 12.1.0.2. If you want to use 12.1.0.2, check out MOS Note 1987905.1. The steps described in this article will work for an 11.2.0.4 instance.
Related articles.
- Oracle Enterprise Manager Cloud Control 12c Post-Installation Setup Tasks
- Upgrade Oracle Enterprise Manager Cloud Control 12c Release 3 (12cR3) to Release 4 (12cR4)
Software
Download the following software:
- Oracle Linux 5.9 or 6.5 (x86_64)
- Oracle Database 11gR2 (11.2.0.4) (x86_64) (if using 11g repository database)
- Enterprise Manager Cloud Control 12c Release 4 (12.1.0.4) (x86_64)
Previous versions of the database can be used to hold the repository, but anything earlier than 11.2.0.2 will require additional patches.
OS Installation
Install Oracle Linux (OL) 5.9 or 6.5 in the same way you would for a regular Oracle Database installation. You can see examples of these types of installations below. Remember to check the relevant database installation article (listed below) for the specific package group selection.
During this installation I used a virtual machine with 8G RAM and 100G disk space. The swap size was set at 8G, the firewall was disabled and SELinux was set to permissive.
Database Installation
Use one of the following articles to install the 11.2.0.4 or 12.1.0.1 database.
- Oracle Database 11g Release 2 (11.2) Installation On Oracle Linux 5
- Oracle Database 11g Release 2 (11.2) Installation On Oracle Linux 6
Remember to do an advanced installation and pick the ALT32UTF8 character set.
The installation documentation says the following packages are necessary for the cloud control installation. If you have performed the database installation as described in one of the above articles, most of these prerequisites will already have been met.
# OL5 and OL6
yum install make -y
yum install binutils -y
yum install gcc -y
yum install libaio -y
yum install glibc-common -y
yum install libstdc++ -y
yum install libXtst -y
yum install sysstat -y
yum install glibc-devel -y
yum install glibc -y
yum install libaio -y

# OL5
yum install setarch -y
yum install rng-utils -y
yum install glibc-devel.i386 -y

# OL6
yum install glibc-devel.i686 -y
If you have performed a default 11g database installation you will need to deconfigure Enterprise Manager Database Control. Run the following command as the "oracle" user.
$ emca -deconfig dbcontrol db -repos drop -SYS_PWD <sys pasword> -SYSMAN_PWD <sysman password>
Make the following initialization parameter changes and restart the instance.
sqlplus / AS SYSDBA

ALTER SYSTEM SET processes=300 SCOPE=SPFILE;
ALTER SYSTEM SET session_cached_cursors=200 SCOPE=SPFILE;
ALTER SYSTEM SET sga_target=2G SCOPE=SPFILE;
ALTER SYSTEM SET shared_pool_size=600M SCOPE=SPFILE;
ALTER SYSTEM SET pga_aggregate_target=1G SCOPE=SPFILE;
ALTER SYSTEM SET job_queue_processes=20 SCOPE=SPFILE;

-- May be required if using older versions of DB.
--ALTER SYSTEM SET log_buffer=10485760 SCOPE=SPFILE;
--ALTER SYSTEM SET open_cursors=300 SCOPE=SPFILE;

-- Restart the instance.
SHUTDOWN IMMEDIATE
STARTUP
If you have done a default installation as described here, the UNDO tablespace will be autoextensible. If you have done a custom installation make sure the UNDO tablespace is at least 200M in size. Also, make sure you have 3 redo logs of at least 300M to prevent a warning during the installation.
Edit the "/etc/security/limits.conf" file, increasing the following entry to 4096 if it is less than that. You will need to reboot after this.
oracle soft nofile 4096
The database installation is now complete.
Cloud Control 12c Installation
Make the following directories to hold the management server and agent.
$ mkdir -p /u01/app/oracle/oms12cr4
$ mkdir -p /u01/app/oracle/agent12c
Unzip the Cloud Control media, the start the installation by running the "runInstller" script.
$ mkdir em12cr4
$ unzip -d em12cr4 em12104_linux64_disk1.zip
$ unzip -d em12cr4 em12104_linux64_disk2.zip
$ unzip -d em12cr4 em12104_linux64_disk3.zip
$ cd em12cr4

$ ./runInstaller
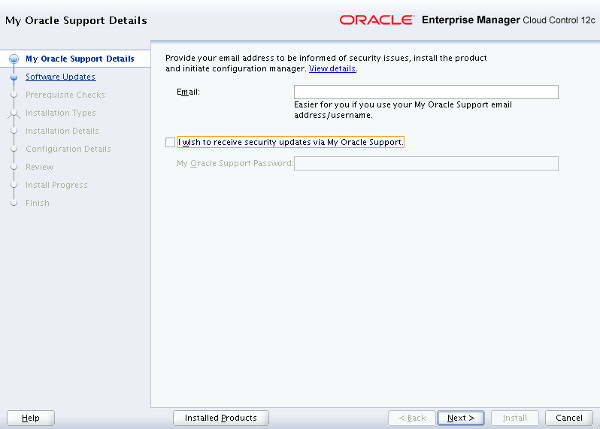
If you wish to receive support information, enter the required details, or uncheck the security updates checkbox and click the "Next" button. Click the "Yes" button the subsequent warning dialog.
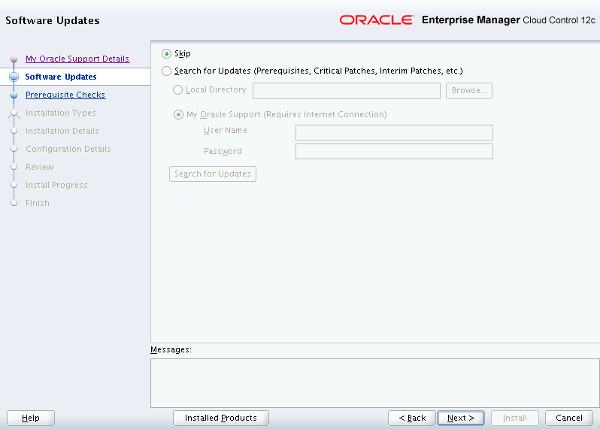
If you wish to check for updates, enter the required details, or check the "Skip" option and click the "Next" button.
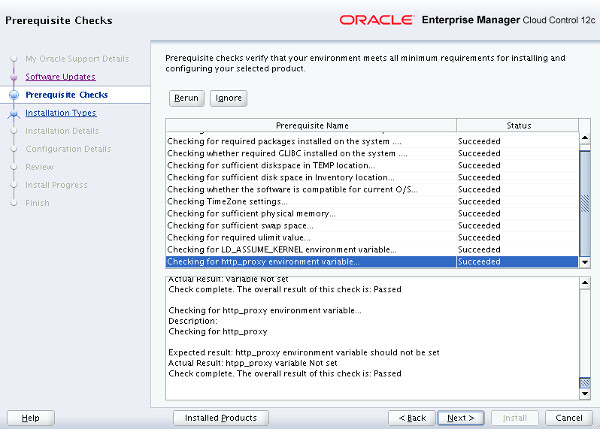
If you have performed the prerequisites as described, the installation should pass all prerequisite checks. Click the "Next" button.
Select the "Create a new Enterprise Manager System" and "Simple" options, then click the "Next" button.

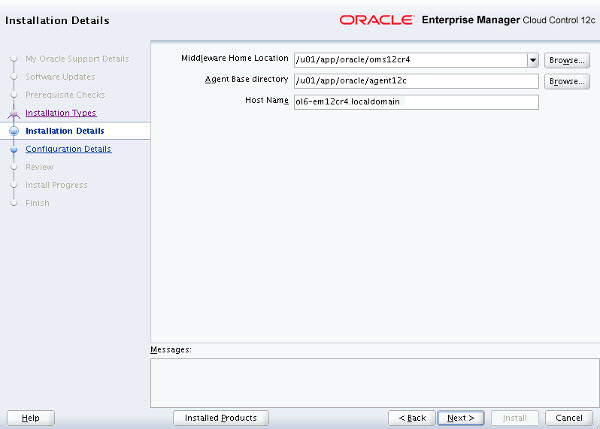
Enter the middleware and agent locations, then click the "Next" button.
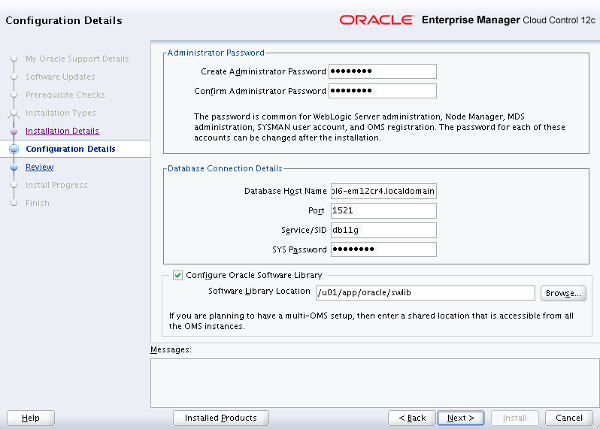
Enter the administrator password and database repository details, then click the "Next" button.
On the first warning dialog, click the "Yes" button.
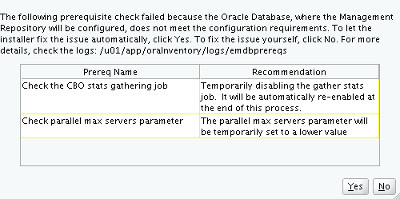
If you have any additional warnings, check they don't look like show-stoppers, then click the "OK" button to continue.
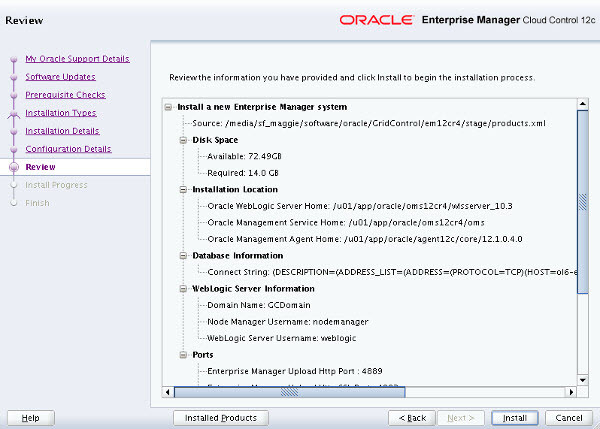
If you are happy with the review information, click the "Install" button.
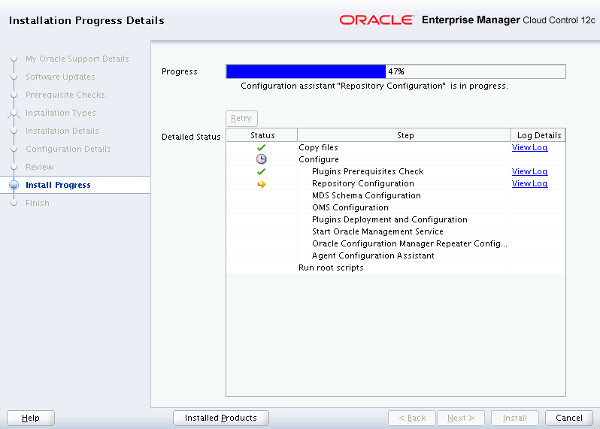
Wait while the installation and configuration take place.
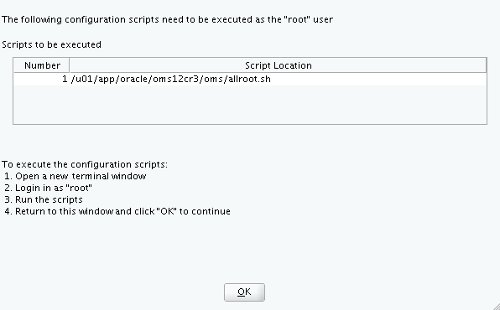
When prompted, run the root scripts, then click the "OK" button.
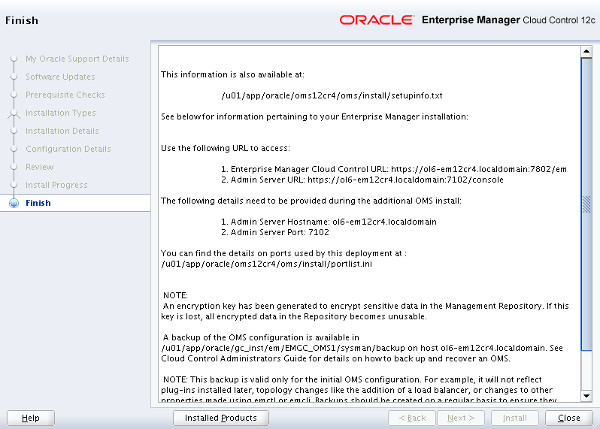
Make note of the URLs, then click the "Close" button to exit the installer. A copy of this information is available in the "/u01/app/oracle/oms12cr4/oms/install/setupinfo.txt" file.
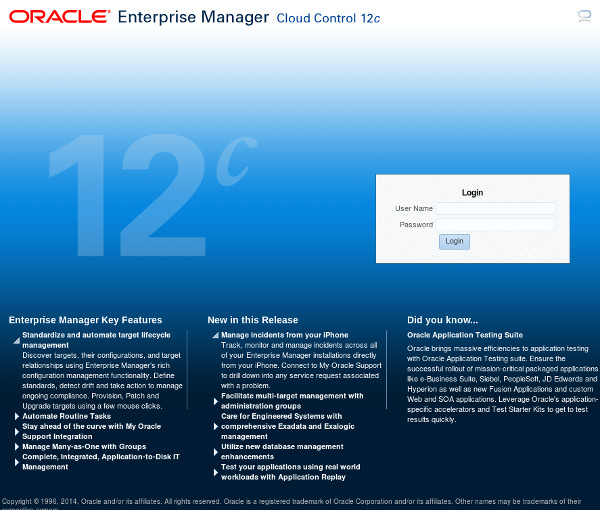
The login screen is available from a browser using the URL provided in the previous screen ("https://ol6-em12cr4.localdomain:7802/em"). Log in with the username "sysman" and the password you specified during your installation.
Once logged in, you are presented with a with the "Accessibility Preference" screen. Click the "Save and Continue" button and you are presented with the the "License Agreement" screen. Click the "I Accept" button and you are presented with the homepage selector screen. On the right side of the screen it lists the post-installation setup tasks you need to work through. I have these documented in a separate article. Select the desired homepage (I chose Summary).
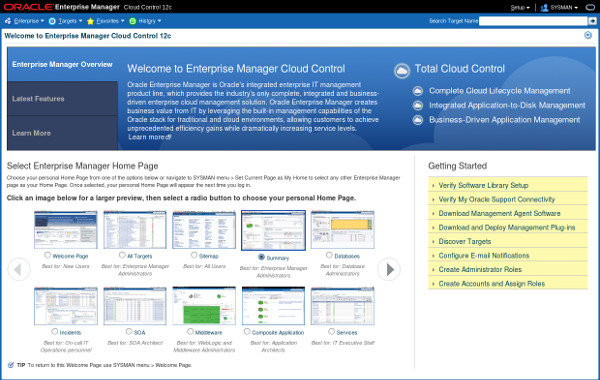
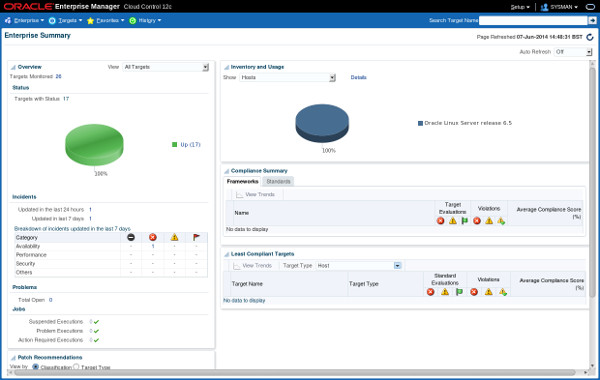
You are presented with the selected screen as the console homepage.
Startup/Shutdown
Cloud Control is set to auto-start using the "gcstartup" service. The "/etc/oragchomelist" file contains the items that will be started by the system.
/u01/app/oracle/oms12cr4/oms

/u01/app/oracle/agent12c/core/12.1.0.4.0:/u01/app/oracle/agent12c/agent_inst
On a simple installation the default auto-start will cause a problem as Cloud Control will attempt to start before the database has started. The service can be disabled by commenting out (using #) all the contents of the "/etc/oragchomelist" file to prevent the auto-start and use start/stop scripts described below.
If the start/stop needs to be automated, you can do it in the usual way using Linux service that calls your start/stop scripts that include the database management.
Use the following commands to turn on all components installed by this article.
#!/bin/bash
export ORACLE_HOME=/u01/app/oracle/product/11.2.0.4/db_1
export OMS_HOME=/u01/app/oracle/oms12cr4/oms
export AGENT_HOME=/u01/app/oracle/agent12c/agent_inst

# Start everything
$ORACLE_HOME/bin/dbstart $ORACLE_HOME

$OMS_HOME/bin/emctl start oms

$AGENT_HOME/bin/emctl start agent
Use the following commands to turn off all components installed by this article.
#!/bin/bash
export ORACLE_HOME=/u01/app/oracle/product/11.2.0.4/db_1
export OMS_HOME=/u01/app/oracle/oms12cr4/oms
export AGENT_HOME=/u01/app/oracle/agent12c/agent_inst

# Stop everything
$OMS_HOME/bin/emctl stop oms -all

$AGENT_HOME/bin/emctl stop agent

$ORACLE_HOME/bin/dbshut $ORACLE_HOME
For more information see:
- Oracle Enterprise Manager Cloud Control 12c Post-Installation Setup Tasks
- Upgrade Oracle Enterprise Manager Cloud Control 12c Release 3 (12cR3) to Release 4 (12cR4)
- Oracle Enterprise Manager Cloud Control Basic Installation Guide 12c Release 4 (12.1.0.4)
- Changing the heap size of the OMS in EM12c
- How to prevent the “Page Expired” message from appearing in EM12c
Hope this helps. Regards Tim...