8i | 9i | 10g | 11g | 12c | 13c | 18c | 19c | 21c | 23c | Misc | PL/SQL | SQL | RAC | WebLogic | Linux
Azure : Installation of an Oracle Database on Azure
This article gives an overview of creating an Oracle database in a Microsoft Azure virtual machine (VM). This example uses Oracle Linux 7 and Oracle Database 12c Release 1 (12.1.0.2), although the process is similar for any other Oracle Linux and database version.
- Create SSH Key
- Create a Virtual Machine
- Prepare the OS
- Oracle Software Installation
- Database Creation (DBCA)
- Open an Endpoint for the Listener
- Remote Connections
- Other Considerations
Related articles.
- Oracle Linux Virtual Machine (VM) on Micorosft Azure
- Oracle Databases in the Cloud
- A Cure for Virtual Insanity: A Vendor-Neutral Introduction to Virtualization Without the Hype
- Oracle Database Consolidation Comparison
Create SSH Key
Before you start, you are going to need a key pair for authentication to your virtual machine. Azure does allow you to use basic credentials, but that it probably not the best idea. Create the key pair using the ssh-keygen command. Accept the default file location and hit return on a passphrase prompts. It will create a private key (id_rsa) and a public key (id_rsa.pub). Keep them safe!
$ ssh-keygen

$ cd ~/.ssh
$ ls
id_rsa		id_rsa.pub	known_hosts
$
If you have any problems, check out the following post on the Azure site.
Create a Virtual Machine
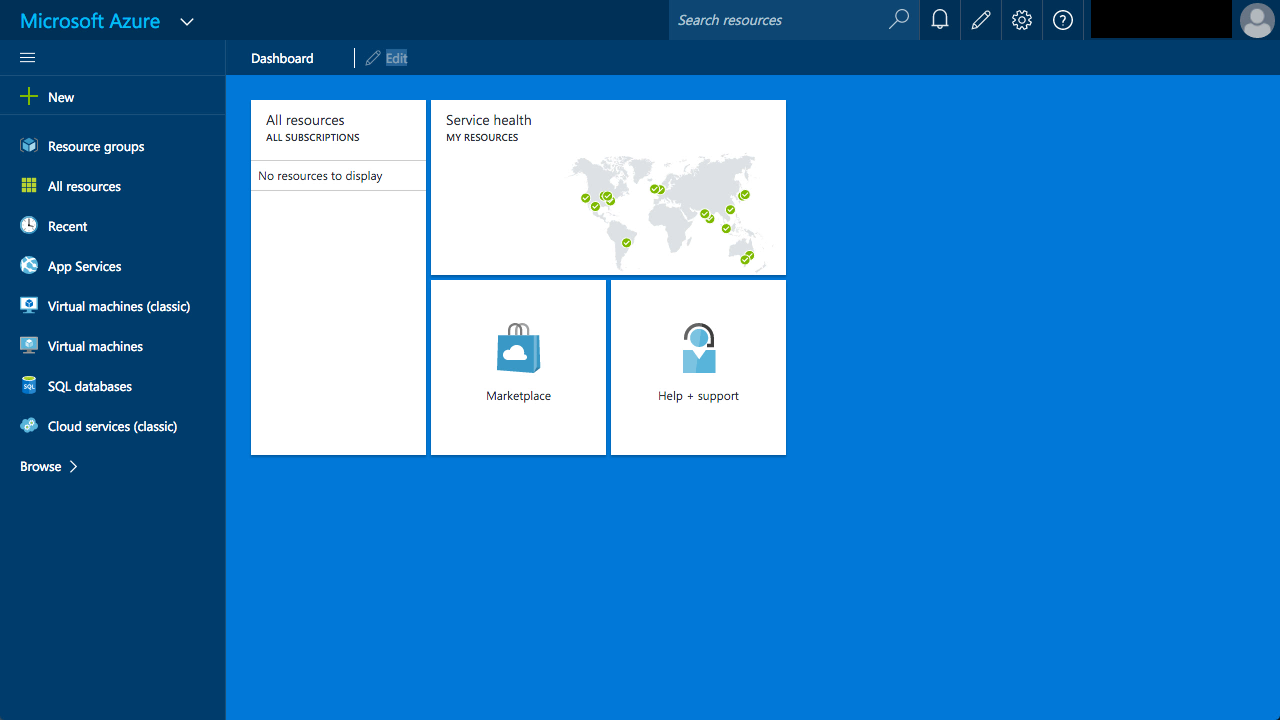
Log in to the Azure portal and click on the "Virtual Machines" link.
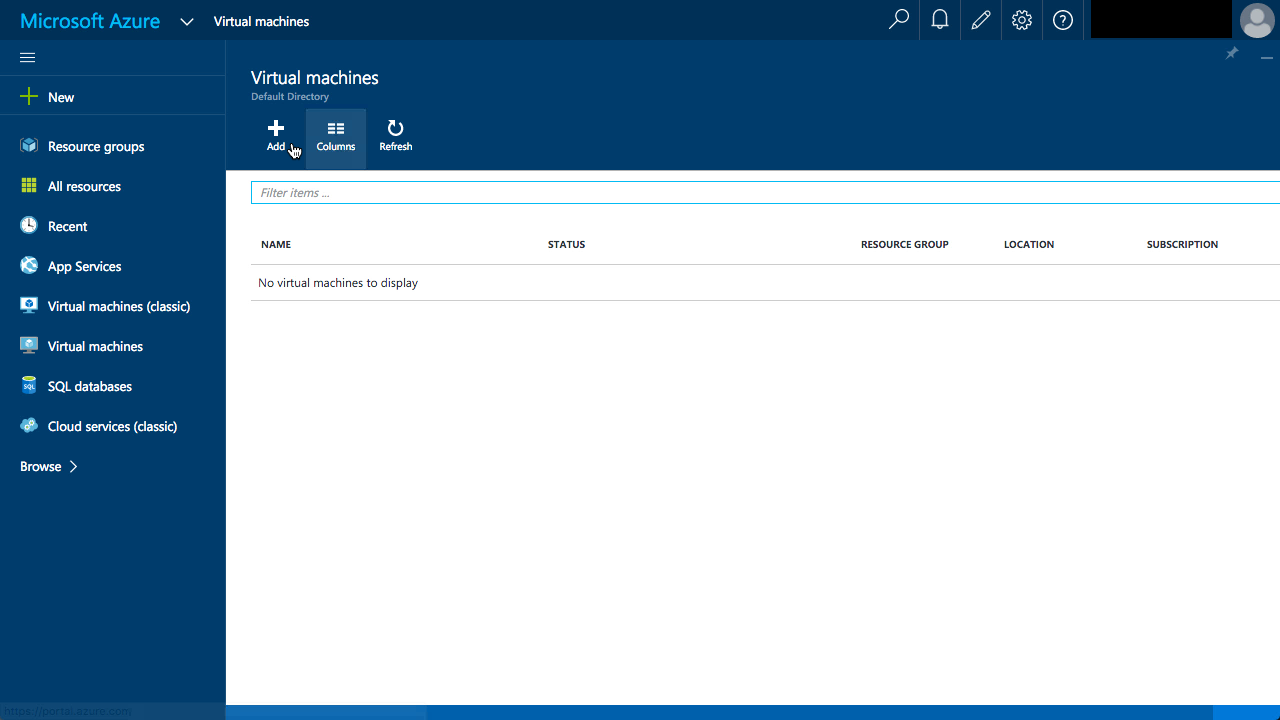
Click the "+ Add" button.
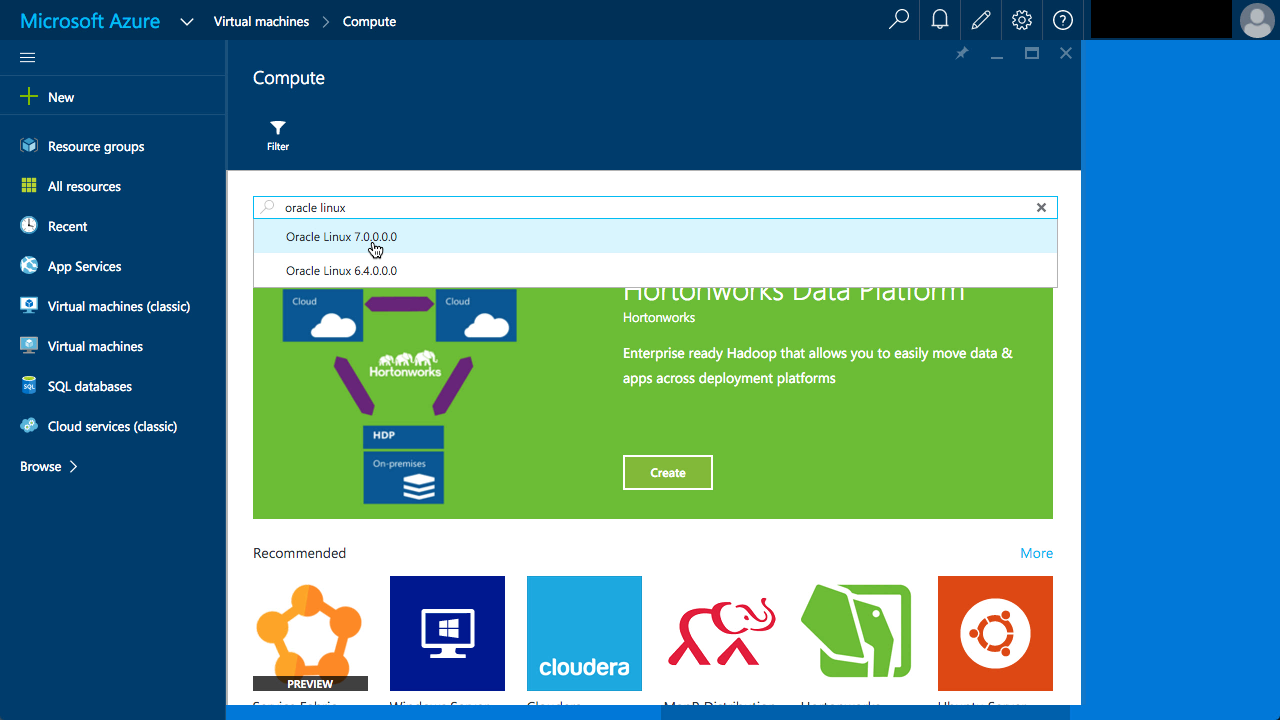
Enter "oracle linux" into the search and click on the "Oracle linux 7.0.0.0.0" option.
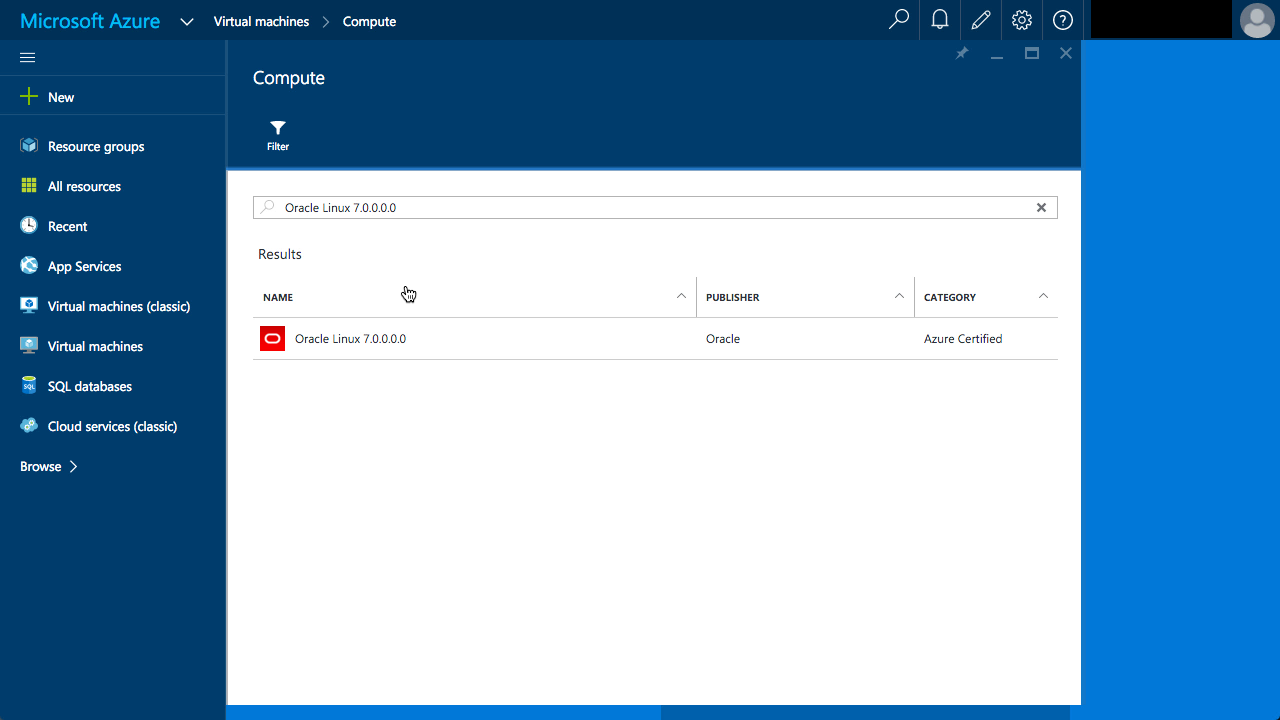
Click on the Oracle linux 7.0.0.0.0" search result.
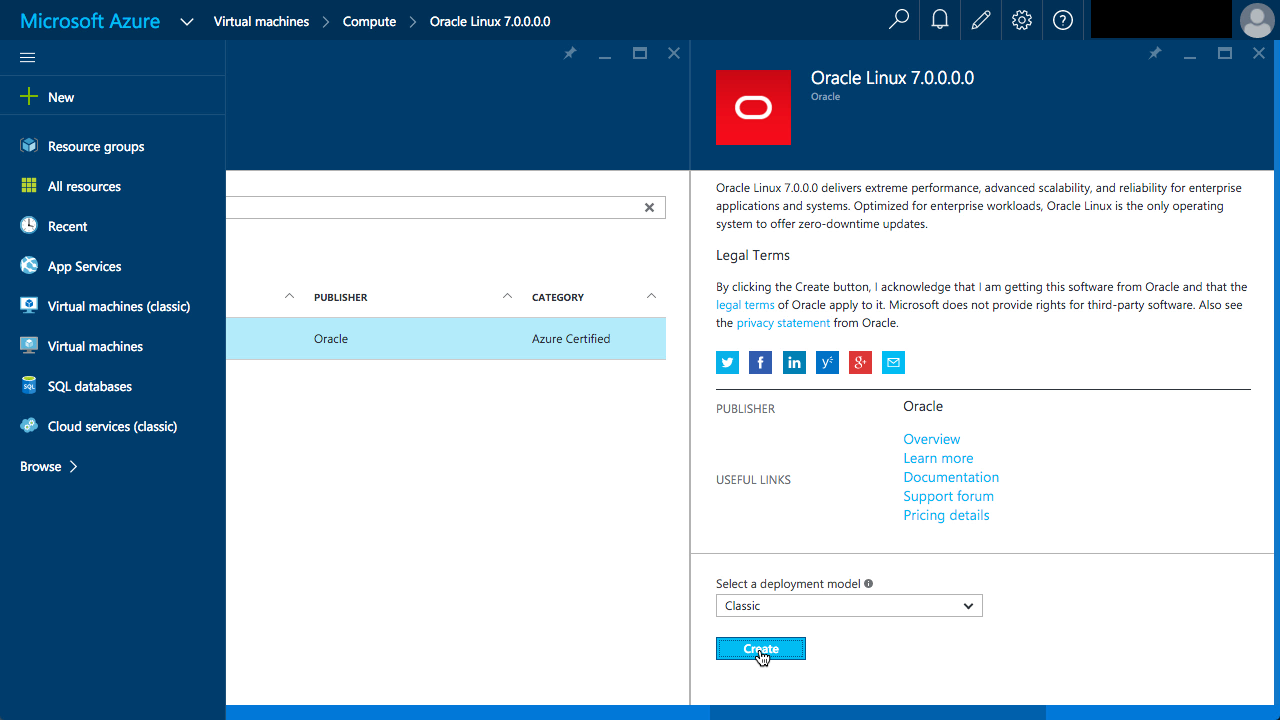
Select the deployment model of "Classic" and click the "Create" button.
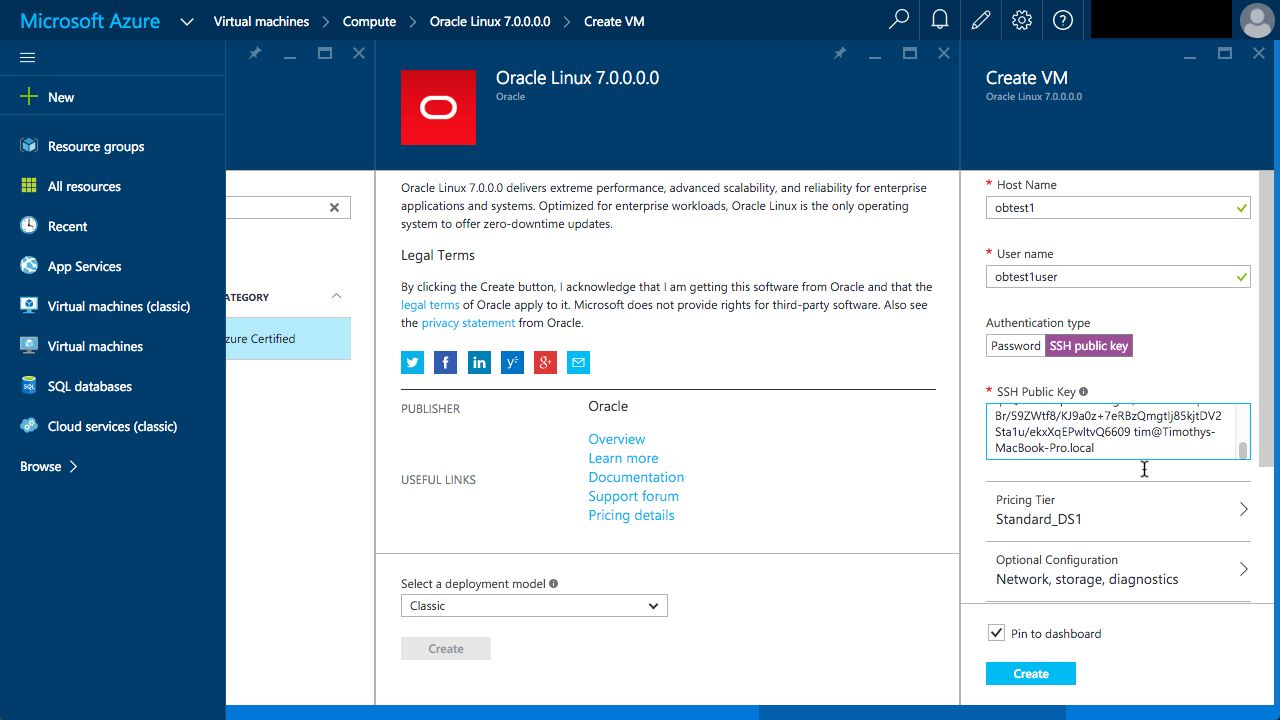
Enter the hostname, username and the SSH Public Key, taken from the "id_rsa.pub" file created previously. When you have selected the appropriate pricing tier and performed any specific network configuration, click the "create" button.
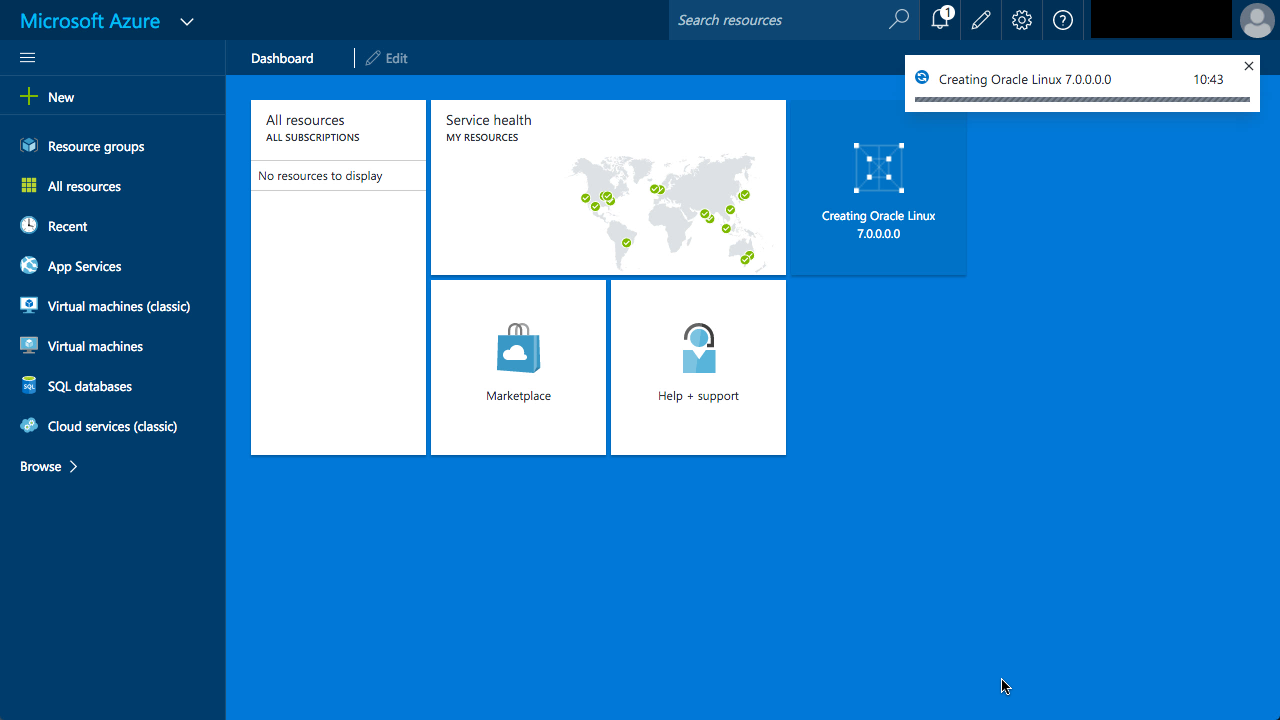
Wait while the VM is created.
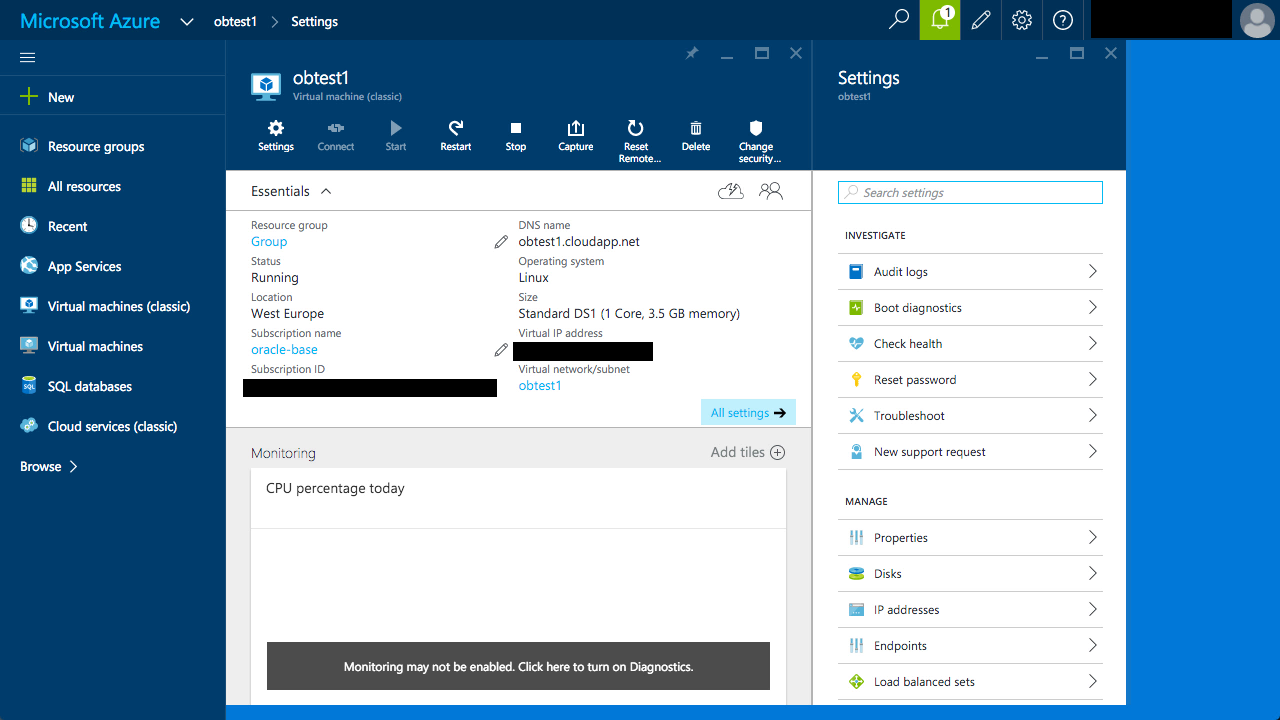
Once created, you are automatically bounced to the VM detail page, which includes the fully qualified hostname and public IP address.
Prepare the OS
Connect to the virtual machine using the following type of commands. Remember to adjust to the name/IP address of your VM and the user you created.
$  ssh obtest1user@obtest1.cloudapp.net
The authenticity of host 'obtest1.cloudapp.net (??.???.???.??)' can't be established.
ECDSA key fingerprint is SHA256:???????????????????????????????????????????.
Are you sure you want to continue connecting (yes/no)? yes
Warning: Permanently added 'obtest1.cloudapp.net,??.???.???.??' (ECDSA) to the list of known hosts.
[obtest1user@obtest1 ~]$
Either use "sudo" before all your admin commands, or switch to the "root" user.
[obtest1user@obtest1 ~]$ sudo su -
[root@obtest1 ~]#
Follow the setup instructions for the Oracle installation you are attempting. In this case, I used the following.
You will probably also need the following.
yum install wget zip unzip -y
yum update -y
usermod -G oinstall,dba oracle
Unzip the installation software.
mkdir -p /u01/software
cd /u01/software

# Copy the Oracle software to the directory.

unzip linuxamd64_12102_database_1of2.zip
unzip linuxamd64_12102_database_2of2.zip
cd database
chown -R oracle.oinstall /u01
Oracle Software Installation
Silent installations are the simplest solution for most cloud-based VMs. The following command shows a silent software-only installation using a response file (oui12102.rsp).
# su - oracle
$ cd /u01/software/database
$ ./runInstaller -silent -ignoreSysPrereqs -responseFile /tmp/oui12102.rsp
Starting Oracle Universal Installer...

Checking Temp space: must be greater than 500 MB.   Actual 1827 MB    Passed
Checking swap space: 0 MB available, 150 MB required.    Failed <<<<

>>> Ignoring required pre-requisite failures. Continuing...

Preparing to launch Oracle Universal Installer from /tmp/OraInstall2015-04-06_04-34-27AM. Please wait ...[oracle@obtest1 database]$
[oracle@obtest1 database]$ [WARNING] [INS-13014] Target environment does not meet some optional requirements.
   CAUSE: Some of the optional prerequisites are not met. See logs for details. /tmp/OraInstall2015-04-06_04-34-27AM/installActions2015-04-06_04-34-27AM.log
   ACTION: Identify the list of failed prerequisite checks from the log: /tmp/OraInstall2015-04-06_04-34-27AM/installActions2015-04-06_04-34-27AM.log. Then either from the log file or from installation manual find the appropriate configuration to meet the prerequisites and fix it manually.
You can find the log of this install session at:
 /u01/app/oraInventory/logs/installActions2015-04-06_04-34-27AM.log
The installation of Oracle Database 12c was successful.
Please check '/u01/app/oraInventory/logs/silentInstall2015-04-06_04-34-27AM.log' for more details.

As a root user, execute the following script(s):
        1. /u01/app/oraInventory/orainstRoot.sh
        2. /u01/app/oracle/product/12.1.0.2/db_1/root.sh


Successfully Setup Software.

$
Remember to run the "orainstRoot.sh" and "root.sh" scripts as directed.
Database Creation (DBCA)
Before you start the database creation, start the listener using the following command.
[oracle@obtest1 database]$ lsnrctl start

LSNRCTL for Linux: Version 12.1.0.2.0 - Production on 06-APR-2015 05:19:53

Copyright (c) 1991, 2014, Oracle.  All rights reserved.

Starting /u01/app/oracle/product/12.1.0.2/db_1/bin/tnslsnr: please wait...

TNSLSNR for Linux: Version 12.1.0.2.0 - Production
Log messages written to /u01/app/oracle/diag/tnslsnr/obtest1/listener/alert/log.xml
Listening on: (DESCRIPTION=(ADDRESS=(PROTOCOL=tcp)(HOST=obtest1)(PORT=1521)))

Connecting to (ADDRESS=(PROTOCOL=tcp)(HOST=)(PORT=1521))
STATUS of the LISTENER
------------------------
Alias                     LISTENER
Version                   TNSLSNR for Linux: Version 12.1.0.2.0 - Production
Start Date                06-APR-2015 05:19:57
Uptime                    0 days 0 hr. 0 min. 4 sec
Trace Level               off
Security                  ON: Local OS Authentication
SNMP                      OFF
Listener Log File         /u01/app/oracle/diag/tnslsnr/obtest1/listener/alert/log.xml
Listening Endpoints Summary...
  (DESCRIPTION=(ADDRESS=(PROTOCOL=tcp)(HOST=obtest1)(PORT=1521)))
The listener supports no services
The command completed successfully
[oracle@obtest1 database]$
As with the software installation, the database creation should be run in silent mode. The following command creates a container database with a single PDB.
[oracle@obtest1 database]$ dbca -silent -createDatabase \
  -templateName General_Purpose.dbc \
  -gdbname cdb1 -sid cdb1 -responseFile NO_VALUE \
  -characterSet AL32UTF8 \
  -sysPassword OraPasswd1 \
  -systemPassword OraPasswd1 \
  -createAsContainerDatabase true \
  -numberOfPDBs 1 \
  -pdbName pdb1 \
  -pdbAdminPassword OraPasswd1 \
  -databaseType MULTIPURPOSE \
  -automaticMemoryManagement false \
  -storageType FS \
  -ignorePreReqs
Copying database files
1% complete
2% complete
8% complete
13% complete
19% complete
27% complete
Creating and starting Oracle instance
29% complete
32% complete
33% complete
34% complete
38% complete
42% complete
43% complete
45% complete
Completing Database Creation
48% complete
51% complete
53% complete
62% complete
70% complete
72% complete
Creating Pluggable Databases
78% complete
100% complete
Look at the log file "/u01/app/oracle/cfgtoollogs/dbca/cdb1/cdb1.log" for further details.
[oracle@obtest1 database]$
You can now connect to the database from the local server.
[oracle@obtest1 ~]$ sqlplus / as sysdba

SQL*Plus: Release 12.1.0.2.0 Production on Mon Apr 6 05:17:57 2015

Copyright (c) 1982, 2014, Oracle.  All rights reserved.


Connected to:
Oracle Database 12c Enterprise Edition Release 12.1.0.2.0 - 64bit Production
With the Partitioning, OLAP, Advanced Analytics and Real Application Testing options

SQL> SELECT name, open_mode FROM v$pdbs;

NAME                           OPEN_MODE
------------------------------ ----------
PDB$SEED                       READ ONLY
PDB1                           READ WRITE

SQL>
Open an Endpoint for the Listener
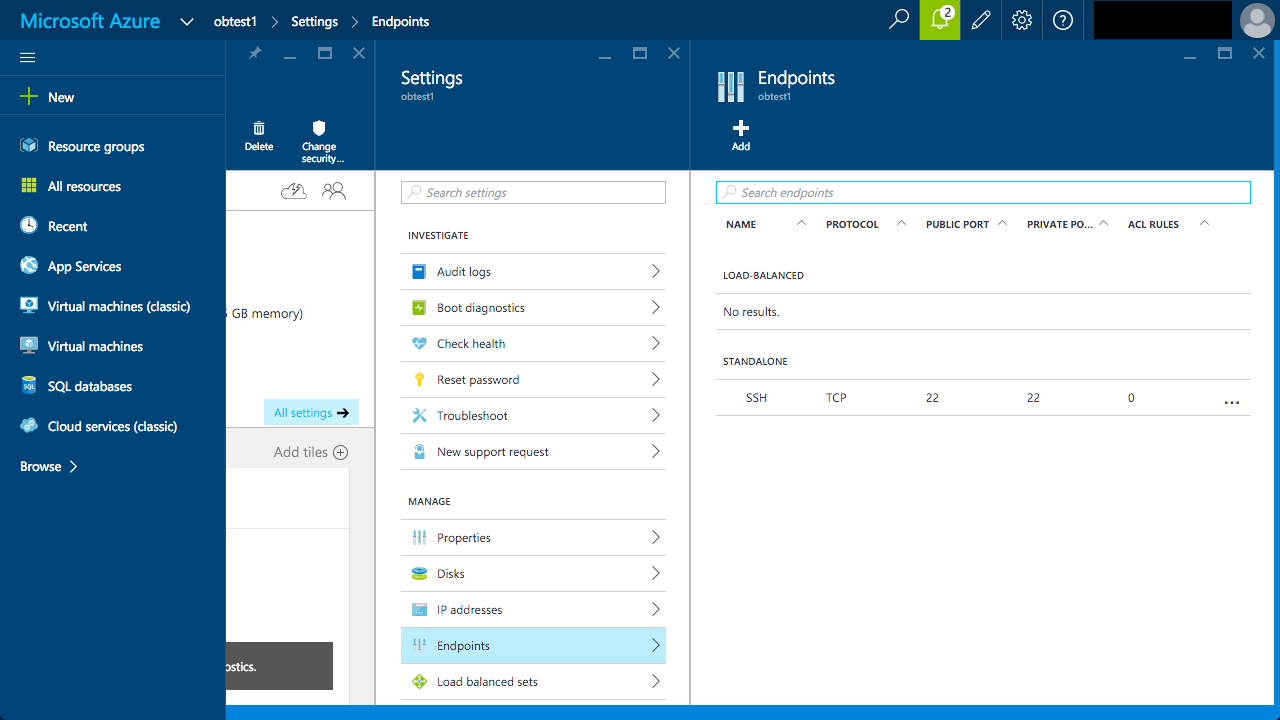
To allow access to the database you will need to create a public endpoint. From the VM details page, click on the "Endpoints" link on the bottom right of the page, then click the "+ Add" button.
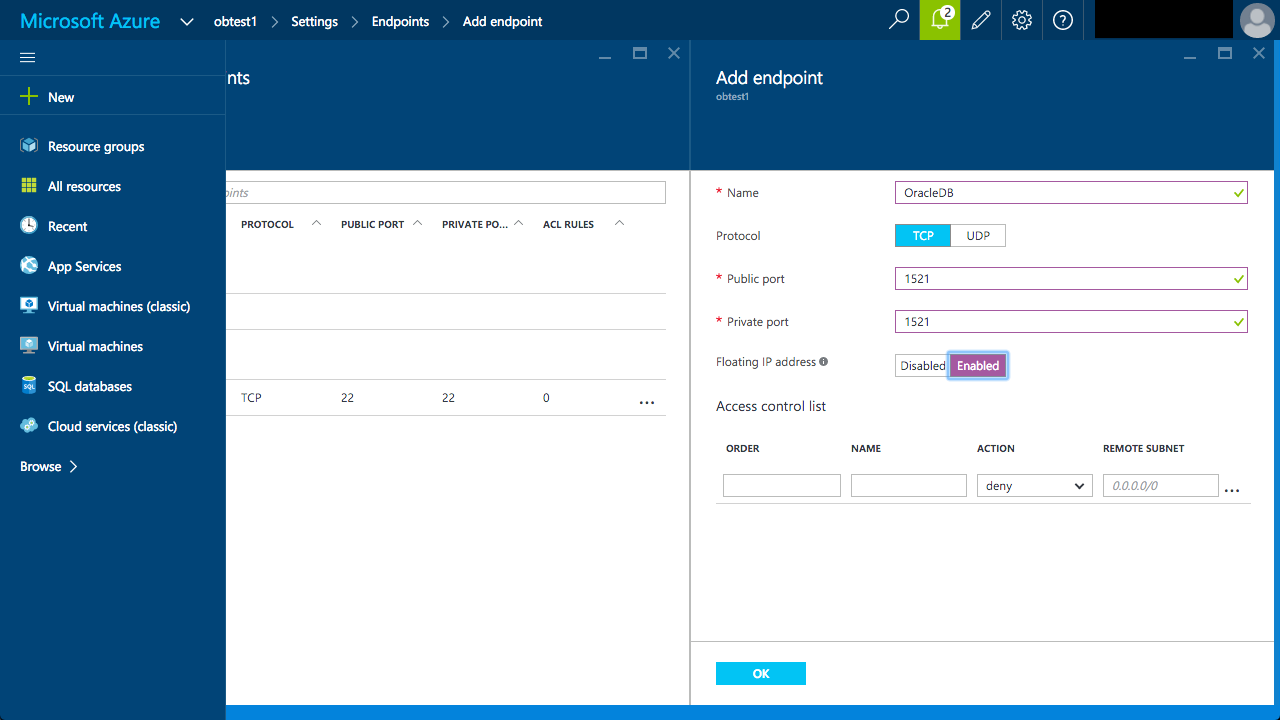
Enter the endpoint details, then click the "OK" button.
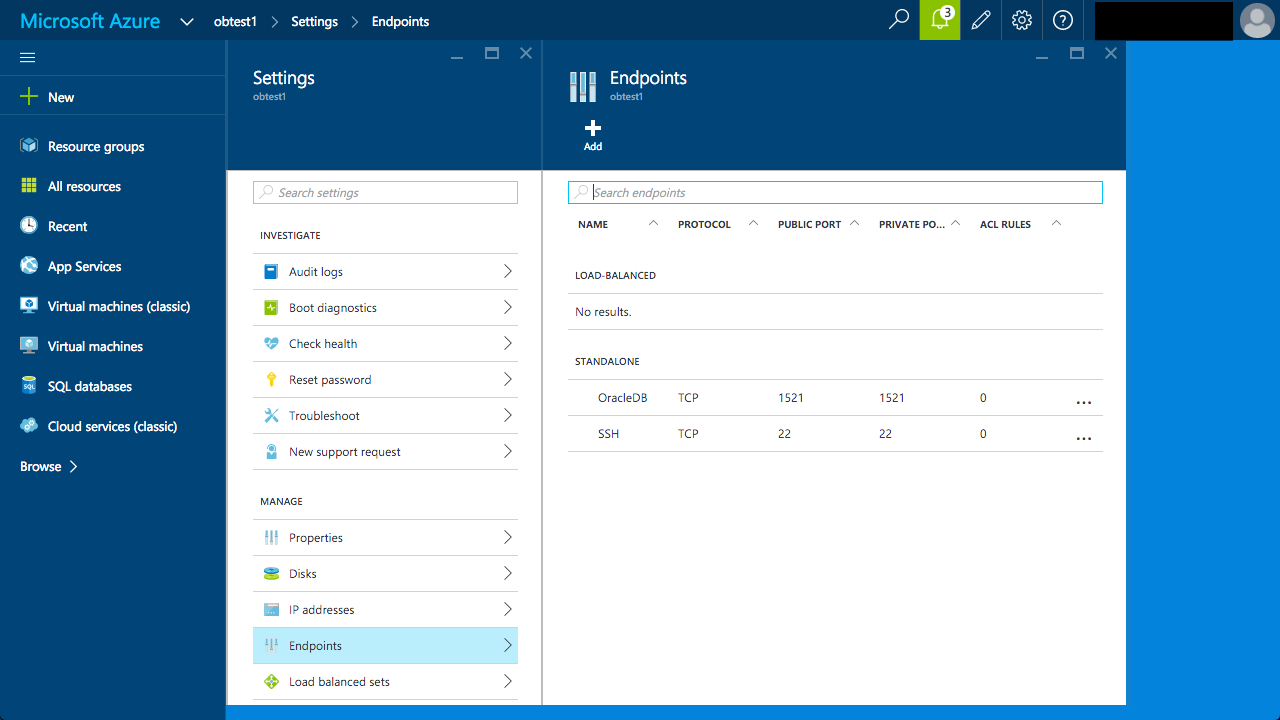
It takes a little time for the endpoint to become visible, but after a few seconds you will get a message to say the endpoint has been saved and it will be listed on the endpoints screen.
Remote Connections
With the public endpoint in place, remote connections are now possible. Create the following "tnsnames.ora" entry on a remote PC.
azure_pdb1=
  (DESCRIPTION=
    (ADDRESS=
      (PROTOCOL=TCP)
      (HOST=obtest1.cloudapp.net)
      (PORT=1521)
    )
    (CONNECT_DATA=
      (SERVER=dedicated)
      (SERVICE_NAME=pdb1)
    )
  )
Connect to the cloud database.
C:\>sqlplus sys@azure_pdb1 as sysdba

SQL*Plus: Release 11.2.0.3.0 Production on Mon Apr 6 10:46:33 2015

Copyright (c) 1982, 2011, Oracle.  All rights reserved.

Enter password:

Connected to:
Oracle Database 12c Enterprise Edition Release 12.1.0.2.0 - 64bit Production
With the Partitioning, OLAP, Advanced Analytics and Real Application Testing options

sys@cdb1>
Other Considerations
It would make sense to protect the public endpoint using the local firewall on the VM.
- Linux Firewall (iptables, system-config-firewall)
- Linux Firewall (firewalld, firewall-cmd, firewall-config)
For more information see:
- Azure : Virtual Machines documentation
- How to Use SSH with Linux on Azure
- Oracle Database 12c Release 1 (12.1) Installation On Oracle Linux 7 (OL7)
- Linux Firewall (iptables, system-config-firewall)
- Linux Firewall (firewalld, firewall-cmd, firewall-config)
- Database Configuration Assistant Command Reference for Silent Mode
- Oracle Linux Virtual Machine (VM) on Micorosft Azure
- Oracle Databases in the Cloud
- A Cure for Virtual Insanity: A Vendor-Neutral Introduction to Virtualization Without the Hype
- Oracle Database Consolidation Comparison
Hope this helps. Regards Tim...