8i | 9i | 10g | 11g | 12c | 13c | 18c | 19c | 21c | 23c | Misc | PL/SQL | SQL | RAC | WebLogic | Linux
Oracle Database 12c Release 1 RAC On Windows 2012 Using VirtualBox
This article describes the installation of Oracle Database 12c Release 1 (12.1) RAC on Windows 2012 Server Standard Edition using VirtualBox with no additional shared disk devices.
- Introduction
- Download Software
- VirtualBox Installation
- Virtual Machine Setup
- Guest Operating System Installation
- Oracle Installation Prerequisites
- Create Shared Disks
- Clone the Virtual Machine
- Install the Grid Infrastructure
- Install the Database Software and Create a Database
- Check the Status of the RAC
Related articles.
Introduction
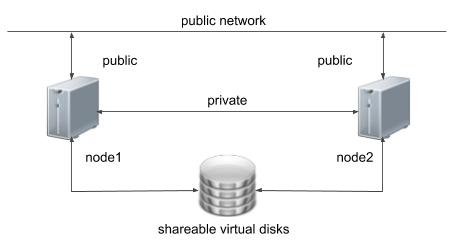
One of the biggest obstacles preventing people from setting up test RAC environments is the requirement for shared storage. In a production environment, shared storage is often provided by a SAN or high-end NAS device, but both of these options are very expensive when all you want to do is get some experience installing and using RAC. A cheaper alternative is to use a FireWire disk enclosure to allow two machines to access the same disk(s), but that still costs money and requires two servers. A third option is to use virtualization to fake the shared storage.
Using VirtualBox you can run multiple Virtual Machines (VMs) on a single server, allowing you to run both RAC nodes on a single machine. In additon, it allows you to set up shared virtual disks, overcoming the obstacle of expensive shared storage.
Before you launch into this installation, here are a few things to consider.
- The finished system includes the host operating system, two guest operating systems, two sets of Oracle Grid Infrastructure (Clusterware + ASM) and two Database instances all on a single server. As you can imagine, this requires a significant amount of disk space, CPU and memory.
- Following on from the last point, the VMs will each need at least 4G of RAM, preferably more if you don't want the VMs to swap like crazy. Don't assume you will be able to run this on a small PC or laptop. You won't.
- This procedure provides a bare bones installation to get the RAC working. There is no redundancy in the Grid Infrastructure installation or the ASM installation. To add this, simply create double the amount of shared disks and select the "Normal" redundancy option when it is offered. Of course, this will take more disk space.
- During the virtual disk creation, I always choose not to preallocate the disk space. This makes virtual disk access slower during the installation, but saves on wasted disk space. The shared disks must have their space preallocated.
- This is not, and should not be considered, a production-ready system. It's simply to allow you to get used to installing and using RAC.
- The Single Client Access Name (SCAN) should be defined in the DNS or GNS and round-robin between one of 3 addresses, which are on the same subnet as the public and virtual IPs. Prior to 11.2.0.2 it could be defined as a single IP address in the "/etc/hosts" file, which is wrong and will cause the cluster verification to fail, but it allowed you to complete the install without the presence of a DNS. This does not seem to work for 11.2.0.2 onward.
- The virtual machines can be limited to 2Gig of swap, which causes a prerequisite check failure, but doesn't prevent the installation working. If you want to avoid this, define 3+Gig of swap.
- This article uses the 64-bit versions of Windows and Oracle 11g Release 2.
- In this article I am using a Oracle Linux as my host OS.
Download Software
Download the following software.
VirtualBox Installation
First, install the VirtualBox software. On RHEL and its clones you do this with the following command as the root user.
# rpm -Uvh VirtualBox-4.2-4.2.16_86992_el6-1.x86_64.rpm
The package name will vary depending on the host distribution you are using. Once complete, VirtualBox is started from the menu.
Virtual Machine Setup
Now we must define the two virtual RAC nodes. We can save time by defining one VM, then cloning it when it is installed.
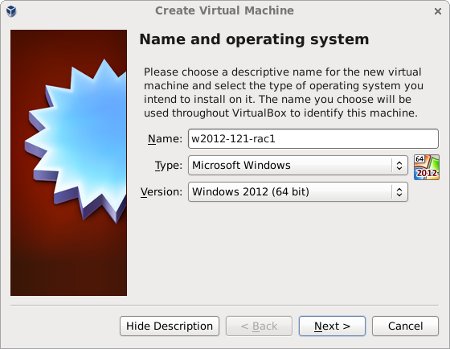
Start VirtualBox and click the "New" button on the toolbar. Enter the name "w2012-121-rac1", OS "Microsoft Windows" and Version "Windows 2012 (64 bit)", then click the "Next" button.
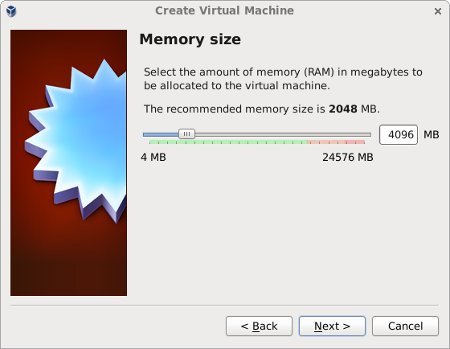
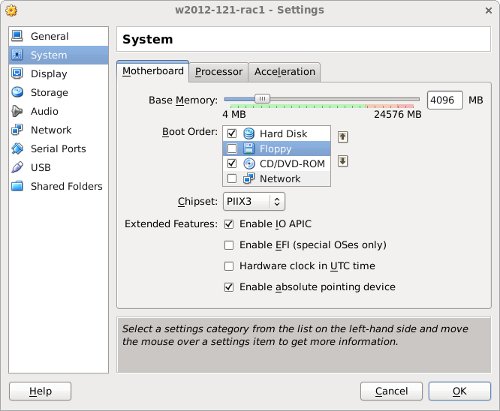
Enter "4096" as the base memory size, then click the "Next" button. Use more memory if you have enough physical memory on your machine as it will make the process much quicker!
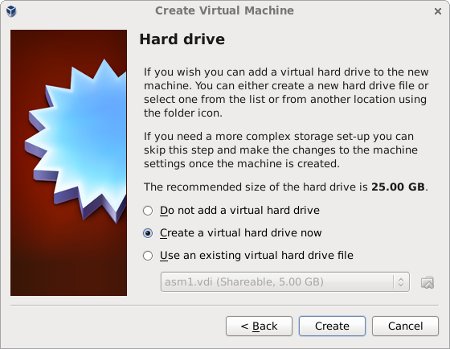
Accept the default option to create a new virtual hard disk by clicking the "Create" button.
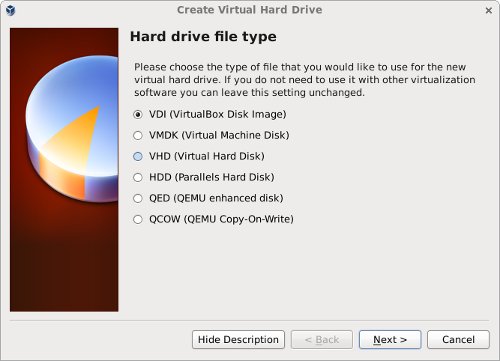
Acccept the default hard drive file type by clicking the "Next" button.
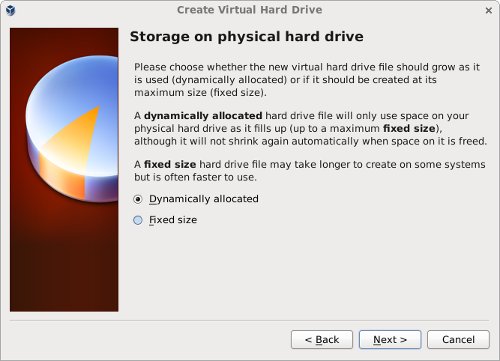
Acccept the "Dynamically allocated" option by clicking the "Next" button.
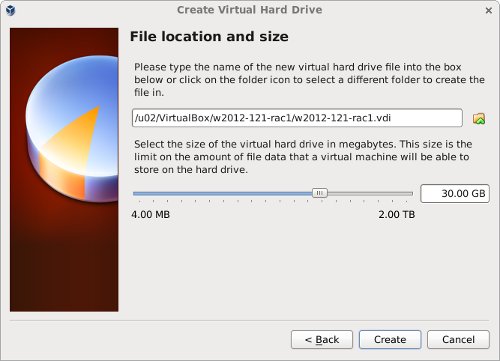
Accept the default location and set the size to "30G", then click the "Create" button. If you can spread the virtual disks onto different physical disks, that will improve performance.
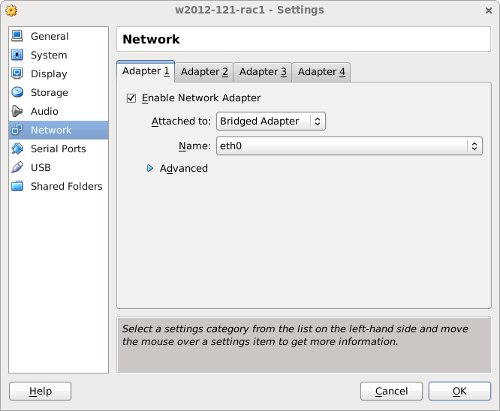
The "w2012-121-rac1" VM will appear on the left hand pane. Scroll down the details on the right and click on the "Network" link.
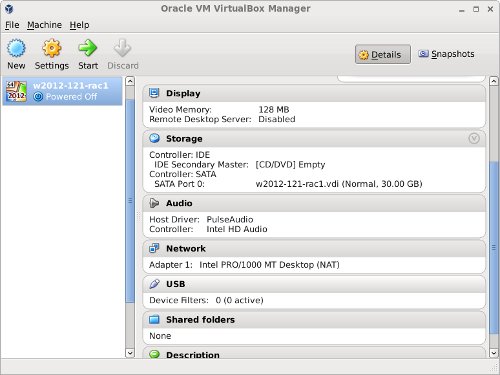
Make sure "Adapter 1" is enabled, set to "Bridged Adapter", then click on the "Adapter 2" tab.
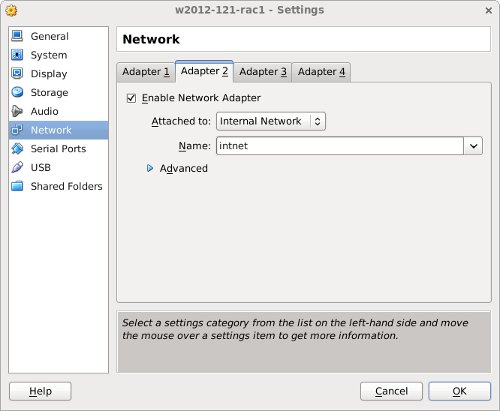
Make sure "Adapter 2" is enabled, set to "Internal Network", then click on the "System" section.
Move "Hard Disk" to the top of the boot order and uncheck the "Floppy" option, then click the "OK" button.
The virtual machine is now configured so we can start the guest operating system installation.
Guest Operating System Installation
With the new VM highlighted, click the "Start" button on the toolbar. On the "Select start-up disk" screen, choose the relevant Oracle Linux ISO image and click the "Start" button.
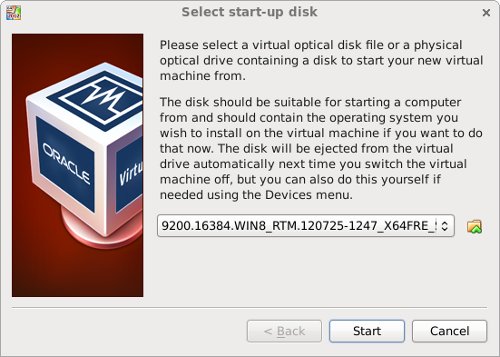
The resulting console window will contain the Windows 2012 boot screen.
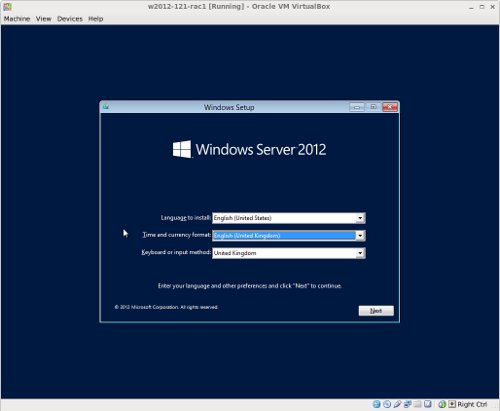
Continue through the Full Standard Edition installation as you would for a normal server. In this case I was using an evaluation version of Windows 2012, so I picked the "Windows Server 2012 Standard Evaluation (Server with a GUI)" option. Pick the custom install when doing a fresh installation.
When the installation is complete, install the VirtualBox Guest Additions on the server. This is initiated from the "Devices > Install Guest Additions..." menu. Accept all the defaults and reboot the server when requested.
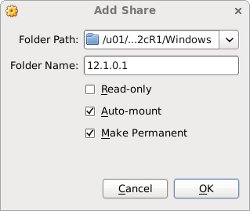
Create a shared folder (Devices > Shared Folders) on the virtual machine, pointing to the directory on the host where the Oracle software was unzipped. Check the "Auto-mount" and "Make Permanent" options before clicking the "OK" button.
The VM will need to be restarted for the guest additions to be used properly. The next section requires a shutdown so no additional restart is needed at this time. Once the VM is restarted, the shared folder will be available as the "E:\" drive.
Oracle Installation Prerequisites
Perform the following steps whilst logged into the virtual machine.
Turn off the Windows firewall "Server Manager > Local Server > Windows Firewall > Public:On > Turn Windows Firewall on or off" to prevent it from interfering with the sever communication. You can turn it on later and open up any required ports if you want to.
Amend the "C:\windows\system32\drivers\etc\hosts" file to contain the following information. Even if you are using DNS to resolve the SCAN, include the SCAN entries in the "hosts" files. Without them the installer had trouble recognising the SCAN.
127.0.0.1       localhost.localdomain   localhost
# Public
192.168.0.151   w2012-121-rac1.localdomain          w2012-121-rac1
192.168.0.152   w2012-121-rac2.localdomain          w2012-121-rac2
# Private
192.168.1.151   w2012-121-rac1-priv.localdomain     w2012-121-rac1-priv
192.168.1.152   w2012-121-rac2-priv.localdomain     w2012-121-rac2-priv
#Virtual
192.168.0.153   w2012-121-rac1-vip.localdomain      w2012-121-rac1-vip
192.168.0.154   w2012-121-rac2-vip.localdomain      w2012-121-rac2-vip
# SCAN
192.168.0.155   w2012-121-scan.localdomain          w2012-121-scan
192.168.0.156   w2012-121-scan.localdomain          w2012-121-scan
192.168.0.157   w2012-121-scan.localdomain          w2012-121-scan
Open the "Network Connections" screen (Server Manager > Local Server > Ethernet (click link next to it)). Rename the "Ethernet" to "public" and "Ethernet 2" to "private", making sure you apply the names to the appropriate connections. You can do this by right-clicking on the connection and selecting "Rename" from the pop-up menu.
Set the correct IP information for the public and private connections. Right-click on a connection and select the "Properties" menu option. Click on "Internet Protocol Version 4 (TCP/IPv4)" option and click the "Properties. button. Enter the appropriate IP, subnet, default gateway and DNS for the networks.
public:
- IP Address: 192.168.0.151
- Subnet: 255.255.255.0
- Default Gateway: 192.168.0.1
- DNS: 192.168.0.6
private:
- IP Address: 192.168.1.151
- Subnet: 255.255.255.0
- Default Gateway: N/A
- DNS: N/A
Click on the "Advanced" button, followed by the "DNS" tab. Select the "Append these DNS suffixes (in order)" option and add the domain suffix, in this case "localdomain". Use the "OK" buttons to exit the dialogs.
It's worth double-checking the MAC addresses of the network adapters in the VM against those of the network interfaces on the guest operating system. Make sure the public interface is the bridged connection. The guest OS sometimes shows the interfaces out of order.
If any of the network connections are left in a disabled state, right-click on then and select the "Diagnose" option to repair them.
Ensure the public interface is first in the bind order:
- On the "Network Connections" dialog, press "Alt+N" to show the advanced menu. Select "Advanced Settings...".
- On the "Adapters and Bindings" tab, make sure the public interface is the first interface listed.
- Click on each network in turn and make sure the "TCP/IPv4" bindings come before the "TCP/IPv6" bindings. This should be correct by default.
- Accept any modifications by clicking on the "OK" button and exiting the "Network Connections" dialog.
Disable Windows Media Sensing for TCP/IP:
- Backup the Windows registry.
Run the Registry Editor (Regedit.exe) and find the following key.
HKEY_LOCAL_MACHINE\SYSTEM\CurrentControlSet\Services\Tcpip\Parameters
Add the following registry value.
Value Name: DisableDHCPMediaSense
Data Type: DWORD
Value: 1
- This change will not take effect until the computer is restarted.
Open the "System Properties" dialog (Start > Control Panel > System and Security > System > Change Settings) and do the following:
- Click the "Change" button, enter the machine name "w2012-121-rac1" then click the "OK" button.
- Click on the Advanced tab and the "Environment Variables" button.
- Edit both the "TEMP" and "TMP" environment variables to be "%WINDIR%\temp", which is "C:\Windows\temp".
- Click the "OK" button and "Apply" out of the "System" dialog.
Restart the server.
Create Shared Disks
Make sure the VM is shutdown, create a directory to host the shared virtual disks on the host OS, then create the shared disks. My host is Linux, so the paths to the virtual disks are UNIX-style paths. If your host is Windows, then you will be using Windows-style paths.
$ mkdir -p /u04/VirtualBox/w2012-121-rac
$ cd /u04/VirtualBox/w2012-121-rac
$
$ # Create the disks and associate them with VirtualBox as virtual media.
$ VBoxManage createhd --filename asm1.vdi --size 5120 --format VDI --variant Fixed
$ VBoxManage createhd --filename asm2.vdi --size 5120 --format VDI --variant Fixed
$ VBoxManage createhd --filename asm3.vdi --size 5120 --format VDI --variant Fixed
$ VBoxManage createhd --filename asm4.vdi --size 5120 --format VDI --variant Fixed
$
$ # Connect them to the VM.
$ VBoxManage storageattach w2012-121-rac1 --storagectl "SATA" --port 1 --device 0 --type hdd --medium asm1.vdi --mtype shareable
$ VBoxManage storageattach w2012-121-rac1 --storagectl "SATA" --port 2 --device 0 --type hdd --medium asm2.vdi --mtype shareable
$ VBoxManage storageattach w2012-121-rac1 --storagectl "SATA" --port 3 --device 0 --type hdd --medium asm3.vdi --mtype shareable
$ VBoxManage storageattach w2012-121-rac1 --storagectl "SATA" --port 4 --device 0 --type hdd --medium asm4.vdi --mtype shareable
$
$ # Make shareable.
$ VBoxManage modifyhd asm1.vdi --type shareable
$ VBoxManage modifyhd asm2.vdi --type shareable
$ VBoxManage modifyhd asm3.vdi --type shareable
$ VBoxManage modifyhd asm4.vdi --type shareable
Start the w2012-121-rac1 virtual machine by clicking the "Start" button on the toolbar. When the server has started, log in so you can partition the disks.
We will partition the disks using the "DiskPart" utility. To get alist of the current disks do the following.
C:\>diskpart

Microsoft DiskPart version 6.0.6001
Copyright (C) 1999-2007 Microsoft Corporation.
On computer: RAC1

DISKPART> list disk

  Disk ###  Status      Size     Free     Dyn  Gpt
  --------  ----------  -------  -------  ---  ---
  Disk 0    Online        30 GB      0 B
  Disk 1    Online        10 GB    10 GB
  Disk 2    Online        10 GB    10 GB
  Disk 3    Online        10 GB    10 GB
  Disk 4    Online        10 GB    10 GB

DISKPART>
In the diskpart utility we will perform the following commands.
automount enable
select disk 1
create partition extended
create partition logical
select disk 2
create partition extended
create partition logical
select disk 3
create partition extended
create partition logical
select disk 4
create partition extended
create partition logical
exit
Stamp the disks for use with ASM. This is done using the asmtool that comes with the Grid Infrastructure media.
C:> E:
E:> cd grid\asmtool
E:> asmtool -add \Device\HardDisk1\Partition1 ORCLDISK1
E:> asmtool -add \Device\HardDisk2\Partition1 ORCLDISK2
E:> asmtool -add \Device\HardDisk3\Partition1 ORCLDISK3
E:> asmtool -add \Device\HardDisk4\Partition1 ORCLDISK4

E:> asmtool -list

NTFS                             \Device\Harddisk0\Partition1              350M
NTFS                             \Device\Harddisk0\Partition2            30368M
ORCLDISK1                        \Device\Harddisk1\Partition1             5117M
ORCLDISK2                        \Device\Harddisk2\Partition1             5117M
ORCLDISK3                        \Device\Harddisk3\Partition1             5117M
ORCLDISK4                        \Device\Harddisk4\Partition1             5117M

E:>
The shared disks are now configured.
Clone the Virtual Machine
VirtualBox allows you to clone VMs, but these also attempt to clone the shared disks, which is not what we want. Instead we must manually clone the VM.
Shutdown the "w2012-121-rac1" VM.
Manually clone the virtual disk using the following commands on the host server.
$ mkdir -p /u03/VirtualBox/w2012-121-rac2
$ VBoxManage clonehd /u02/VirtualBox/w2012-121-rac1/w2012-121-rac1.vdi /u03/VirtualBox/w2012-121-rac2/w2012-121-rac2.vdi
Create the "w2012-121-rac2" virtual machine in VirtualBox in the same way as you did for "w2012-121-rac1", with the exception of using an existing "w2012-121-rac2.vdi" virtual hard drive.
Remember to add the three network adaptors as you did on the first VM. When the VM is created, attach the shared disks to this VM.
$ cd /u04/VirtualBox/w2012-121-rac
$
$ VBoxManage storageattach w2012-121-rac2 --storagectl "SATA" --port 1 --device 0 --type hdd --medium asm1.vdi --mtype shareable
$ VBoxManage storageattach w2012-121-rac2 --storagectl "SATA" --port 2 --device 0 --type hdd --medium asm2.vdi --mtype shareable
$ VBoxManage storageattach w2012-121-rac2 --storagectl "SATA" --port 3 --device 0 --type hdd --medium asm3.vdi --mtype shareable
$ VBoxManage storageattach w2012-121-rac2 --storagectl "SATA" --port 4 --device 0 --type hdd --medium asm4.vdi --mtype shareable
Start the "w2008-112-rac2" virtual machine.
Open the "Network Connections" screen (Server Manager > Local Server > Ethernet (click link next to it)) and amend the IP address values of each network to the appropriate values for the second node.
Open the "System Properties" dialog (Start > Control Panel > System and Security > System > Change Settings) and change the machine name by clicking the "Change" button. Click all "OK" buttons to exit the "System Properties" dialog and restart the server when prompted.
Once the RAC2 virtual machine has restarted, start the RAC1 virtual machine. When both nodes have started, check they can both ping all the public and private IP addresses using the following commands.
ping w2012-121-rac1
ping w2012-121-rac1-priv
ping w2012-121-rac2
ping w2012-121-rac2-priv
At this point the virtual IP addresses defined in the hosts file will not work, so don't bother testing them.
The virtual machine setup is now complete.
Before moving forward you should probably shut down your VMs and take snapshots of them. If any failures happen beyond this point it is probably better to switch back to those snapshots, clean up the shared drives and start the grid installation again. An alternative to cleaning up the shared disks is to back them up now using zip and just replace them in the event of a failure.$ cd /u04/VirtualBox/w2012-121-rac $ zip PreGrid.zip *.vdi
Install the Grid Infrastructure
Make sure both virtual machines are started. Login to "w2012-121-rac1" and start the Oracle installer.
e:
cd grid
setup.exe
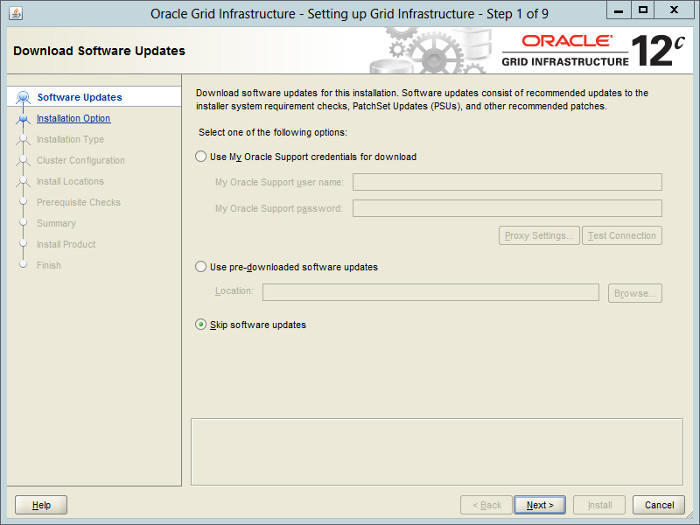
Select the "Skip software updates" option, then click the "Next" button.
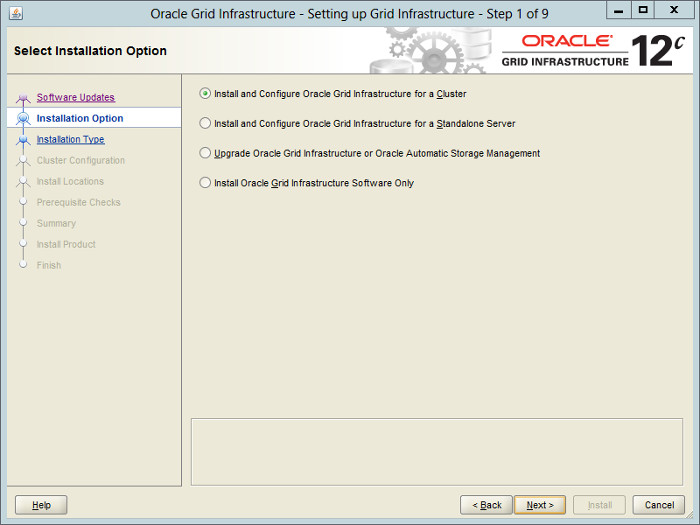
Select the "Install and Configure Oracle Grid Infrastructure for a Cluster" option, then click the "Next" button.
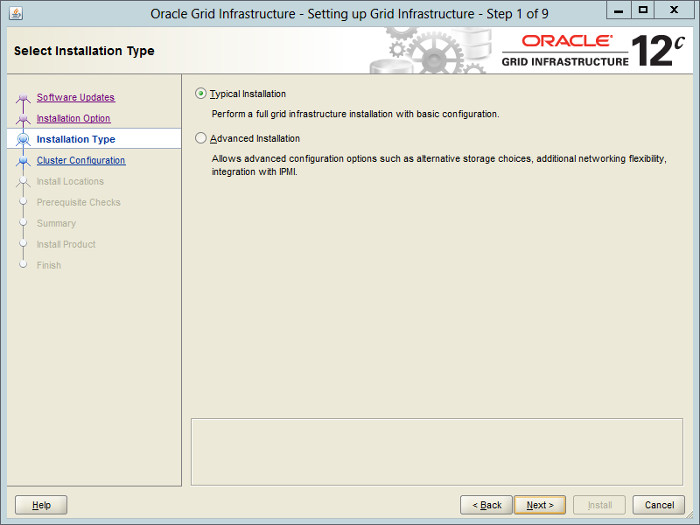
Select the "Typical Installation" option, then click the "Next" button.
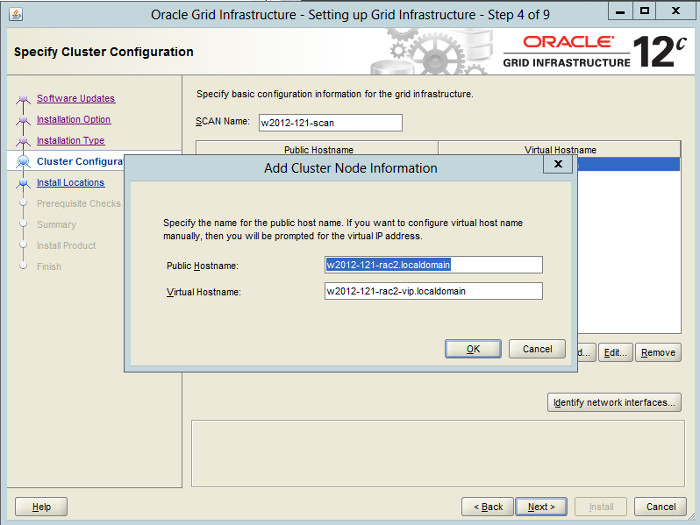
On the "Specify Cluster Configuration" screen, enter the correct SCAN Name and click the "Add" button.

Enter the details of the second node in the cluster, then click the "OK" button.
Click the "Identify network interfaces..." button and check the public and private networks are specified correctly. Remember to mark the NAT interface as "Do Not Use". Once you are happy with them, click the "OK" button and the "Next" button on the previous screen.

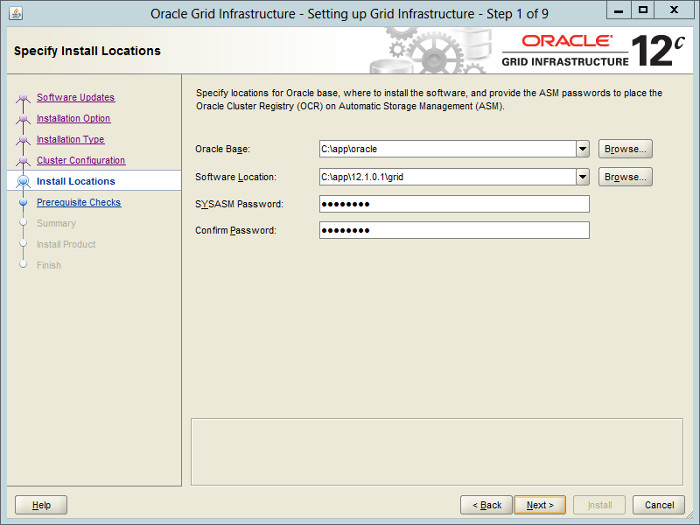
Enter the ORACLE_BASE of "c:\app\12.1.0.1", a software location of "c:\app\12.1.0.1\grid" and the SYSASM password. click the "Next" button.
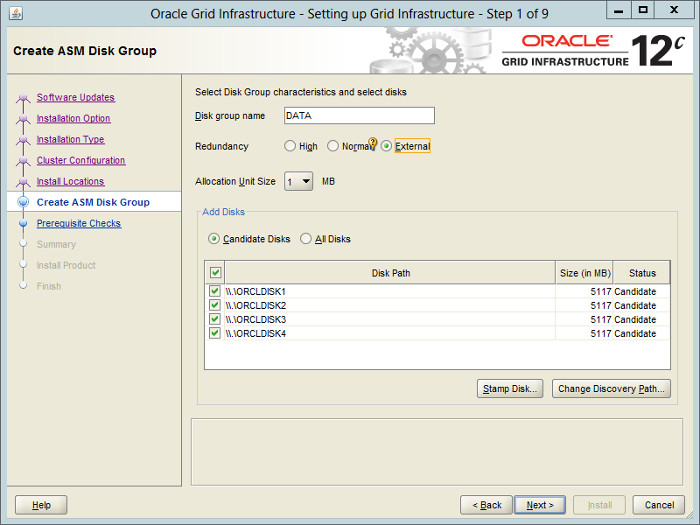
Set the redundancy to "External", select all 4 disks and click the "Next" button.
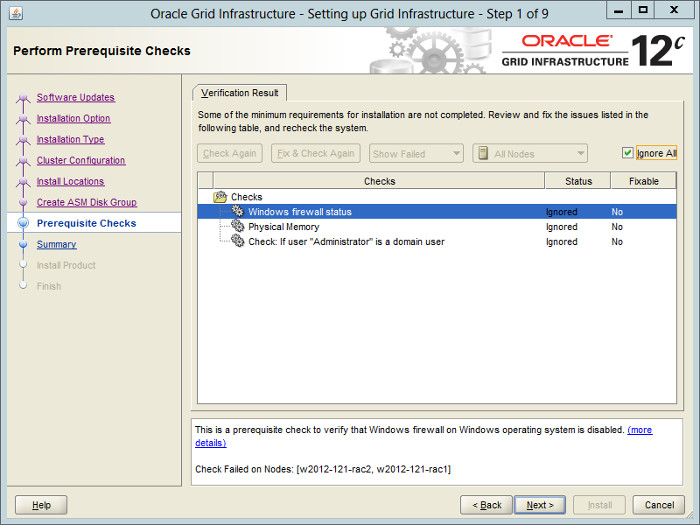
Wait while the prerequisite checks complete. If you have any issues, either fix them or check the "Ignore All" checkbox and click the "Next" button. It is likely the "Windows firewall status", "Physical Memory" and "Administrator" tests will fail for this type of installation.
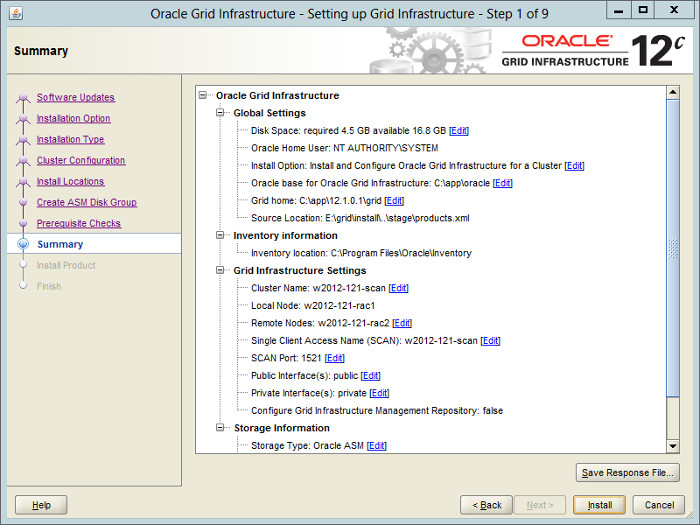
If you are happy with the summary information, click the "Install" button.
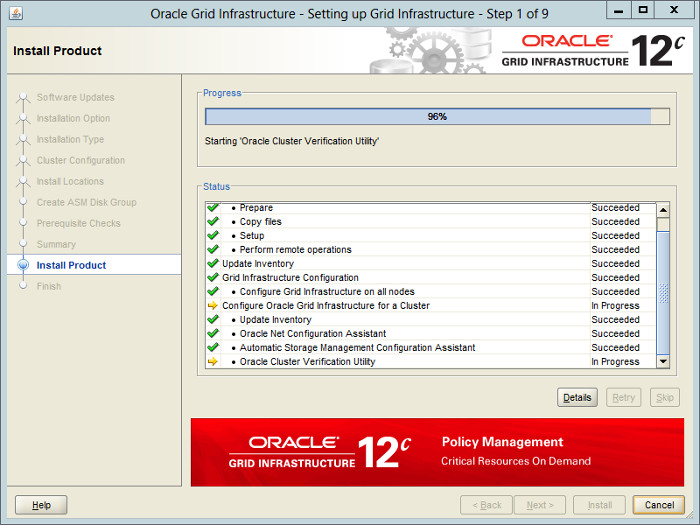
Wait while the setup takes place.
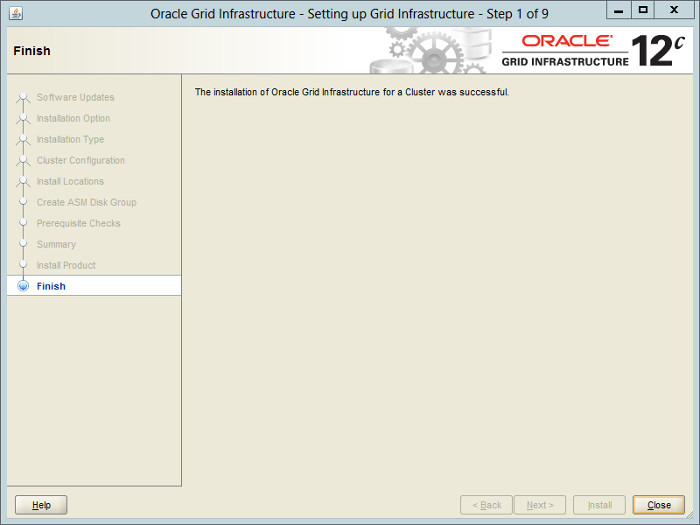
Click the "Close" button to exit the installer.
The grid infrastructure installation is now complete. We can check the status of the installation using the following commands.
C:\>C:\app\12.1.0.1\grid\bin\crsctl stat res -t
--------------------------------------------------------------------------------
Name           Target  State        Server                   State details
--------------------------------------------------------------------------------
Local Resources
--------------------------------------------------------------------------------
ora.DATA.dg
               ONLINE  ONLINE       w2012-121-rac1           STABLE
               ONLINE  ONLINE       w2012-121-rac2           STABLE
ora.LISTENER.lsnr
               ONLINE  ONLINE       w2012-121-rac1           STABLE
               ONLINE  ONLINE       w2012-121-rac2           STABLE
ora.asm
               ONLINE  ONLINE       w2012-121-rac1           Started,STABLE
               ONLINE  ONLINE       w2012-121-rac2           Started,STABLE
ora.net1.network
               ONLINE  ONLINE       w2012-121-rac1           STABLE
               ONLINE  ONLINE       w2012-121-rac2           STABLE
ora.ons
               ONLINE  ONLINE       w2012-121-rac1           STABLE
               ONLINE  ONLINE       w2012-121-rac2           STABLE
--------------------------------------------------------------------------------
Cluster Resources
--------------------------------------------------------------------------------
ora.LISTENER_SCAN1.lsnr
      1        ONLINE  ONLINE       w2012-121-rac2           STABLE
ora.LISTENER_SCAN2.lsnr
      1        ONLINE  ONLINE       w2012-121-rac1           STABLE
ora.LISTENER_SCAN3.lsnr
      1        ONLINE  ONLINE       w2012-121-rac1           STABLE
ora.cvu
      1        ONLINE  ONLINE       w2012-121-rac1           STABLE
ora.oc4j
      1        OFFLINE OFFLINE                               STABLE
ora.scan1.vip
      1        ONLINE  ONLINE       w2012-121-rac2           STABLE
ora.scan2.vip
      1        ONLINE  ONLINE       w2012-121-rac1           STABLE
ora.scan3.vip
      1        ONLINE  ONLINE       w2012-121-rac1           STABLE
ora.w2012-121-rac1.vip
      1        ONLINE  ONLINE       w2012-121-rac1           STABLE
ora.w2012-121-rac2.vip
      1        ONLINE  ONLINE       w2012-121-rac2           STABLE
--------------------------------------------------------------------------------

C:\>
At this point it is probably a good idea to shutdown both VMs and take snapshots. Remember to make a fresh zip of the ASM disks on the host machine, which you will need to restore if you revert to the post-grid snapshots.
$ cd /u04/VirtualBox/w2012-121-rac
$ zip PostGrid.zip *.vdi
Install the Database Software
Make sure the "w2012-121-rac1" and "w2012-121-rac2" virtual machines are started, then login to "w2012-121-rac1" and start the Oracle installer.
e:
cd database
setup.exe
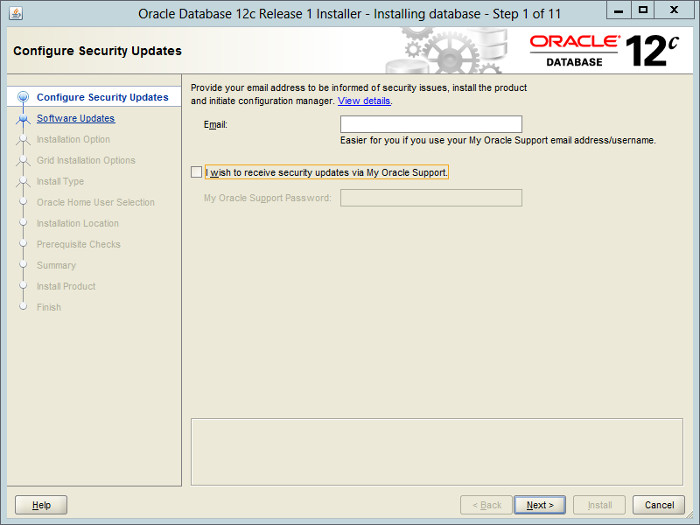
Uncheck the security updates checkbox and click the "Next" button and "Yes" on the subsequent warning dialog.
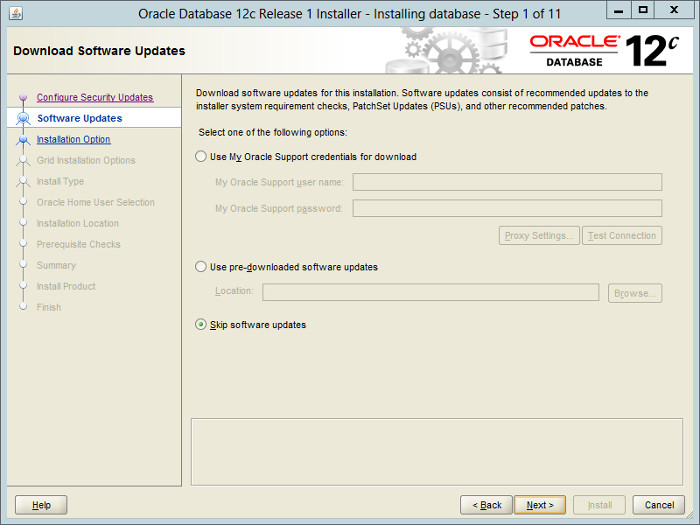
Check the "Skip software updates" checkbox and click the "Next" button.
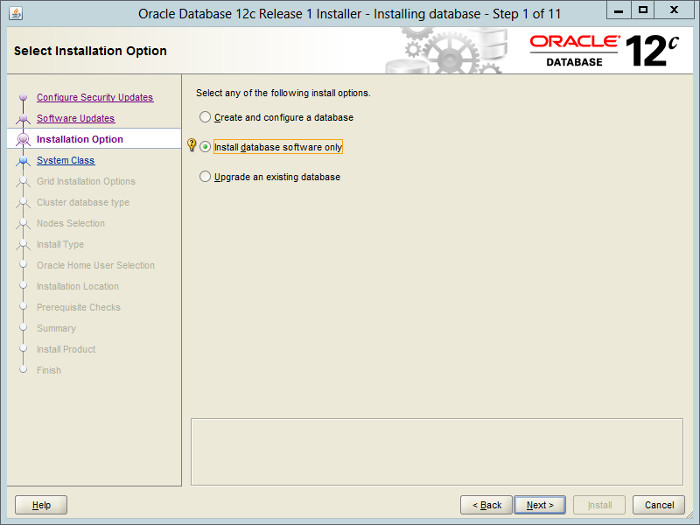
Select the "Install database software only" option, then click the "Next" button.
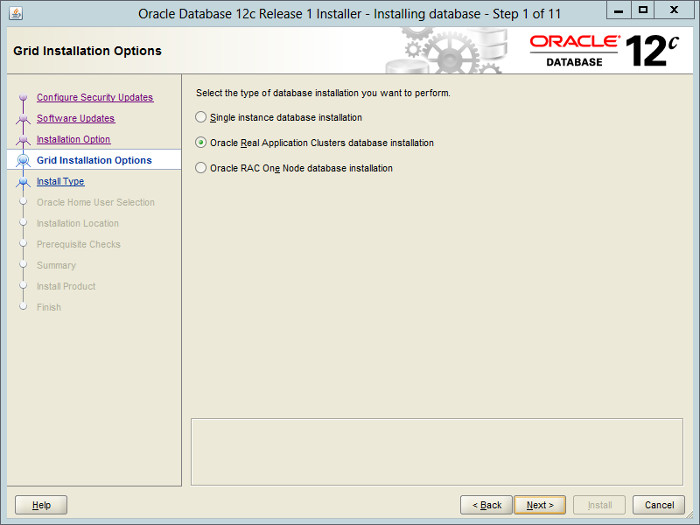
Accept the "Oracle Real Application Clusters database installation" option by clicking the "Next" button.
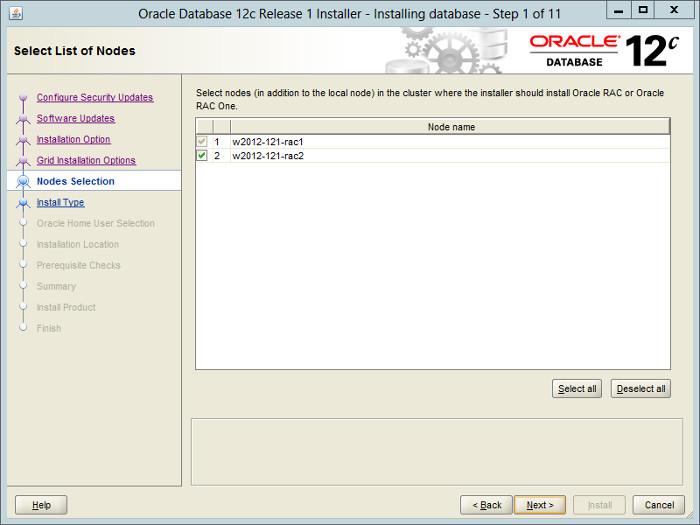
Make sure both nodes are selected, then click the "Next" button.
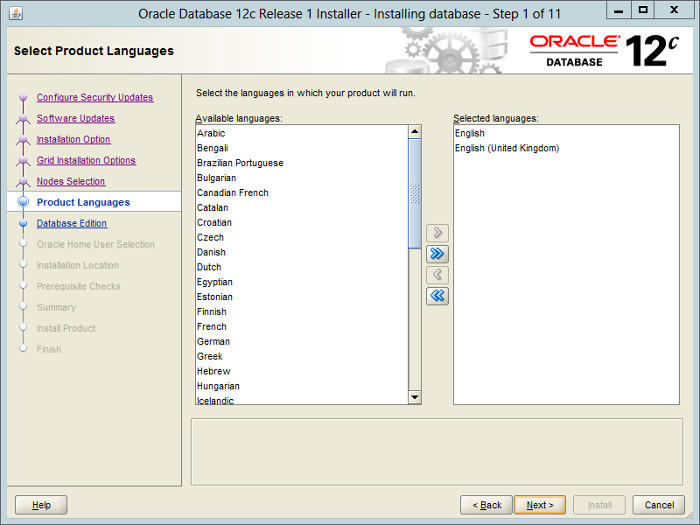
Select the required languages, then click the "Next" button.
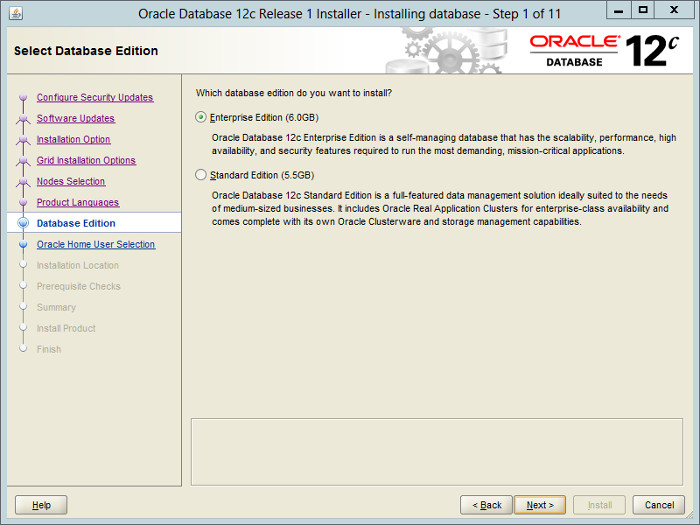
Select the "Enterprise Edition" option, then click the "Next" button.
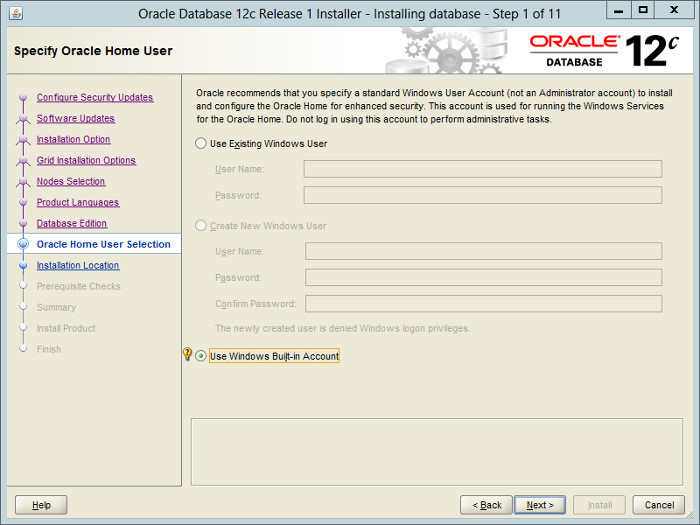
Decide the credentials for the database user, then click the "Next" button. In this case I picked the "Use Windows Built-in Account" option, which is not recommended. If you pick this option, accept the following warning dialog.
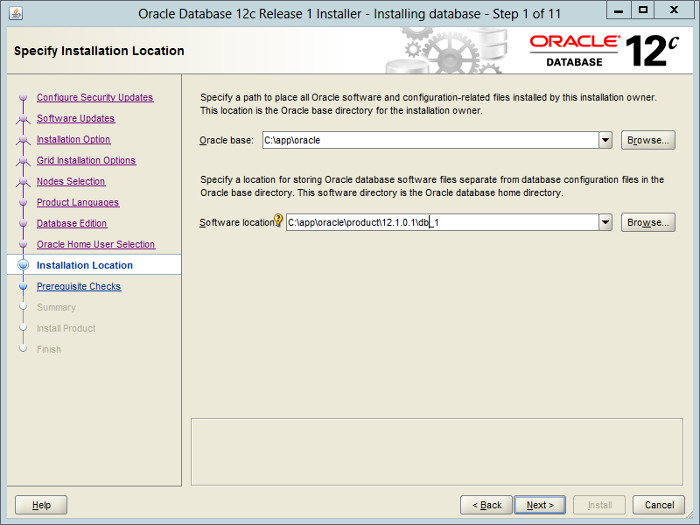
Enter "c:\app\oracle" as the Oracle base and "c:\app\oracle\product\12.1.0.1\db_1" as the software location, then click the "Next" button.
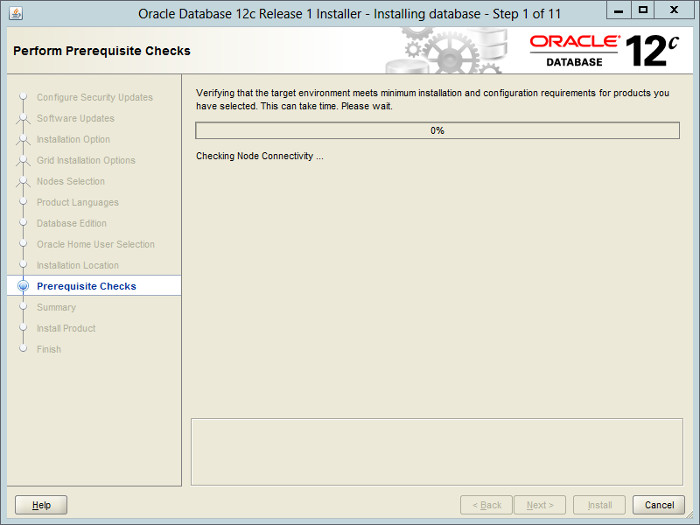
Wait for the prerequisite check to complete. If there are any problems either fix them, or check the "Ignore All" checkbox and click the "Next" button.
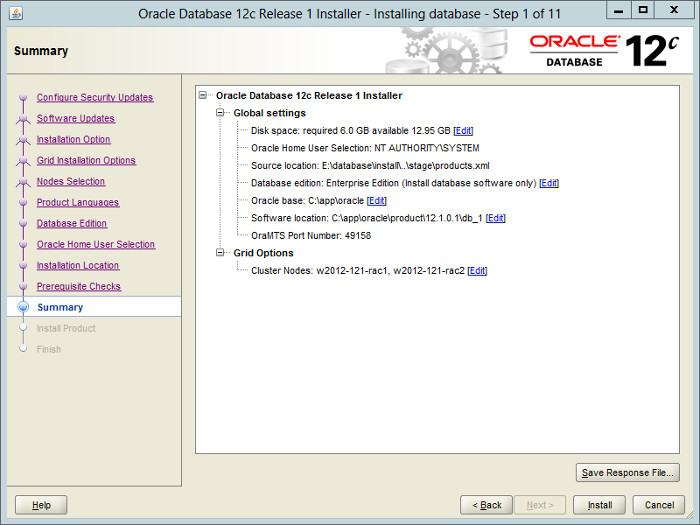
If you are happy with the summary information, click the "Install" button.
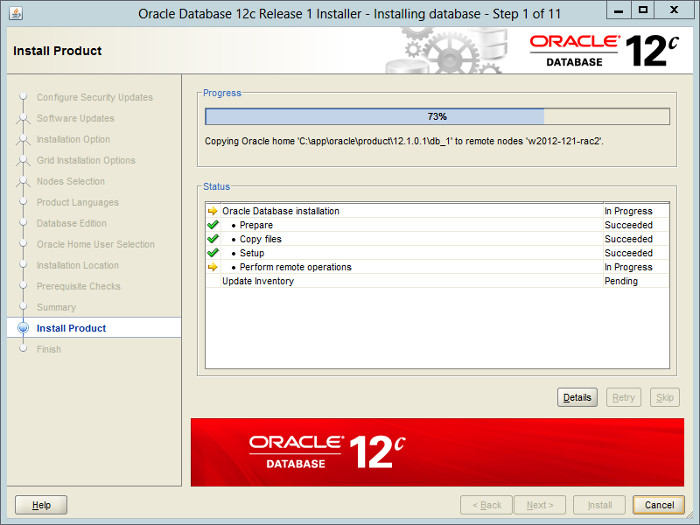
Wait while the installation takes place.
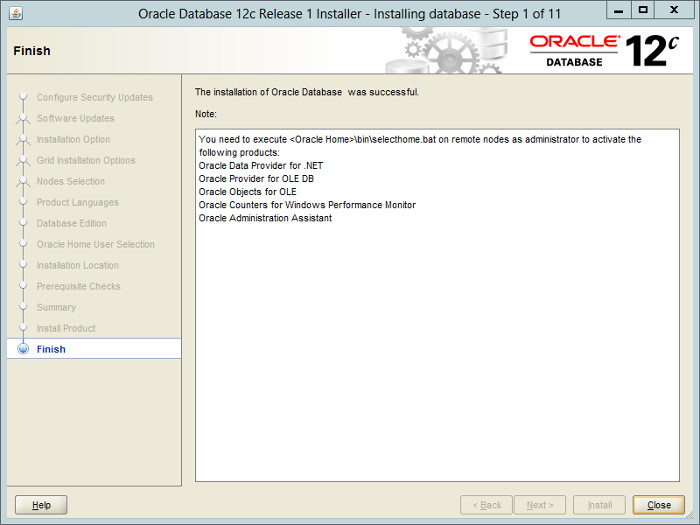
Click the "Close" button to exit the installer.
Shutdown both VMs and take snapshots. Remember to make a fresh zip of the ASM disks on the host machine, which you will need to restore if you revert to the post-db snapshots.
$ cd /u04/VirtualBox/w2012-121-rac
$ zip PostDB.zip *.vdi
Create a Database
Make sure the "w2012-121-rac1" and "w2012-121-rac2" virtual machines are started, then login to "w2012-121-rac1" and start the Database Creation Asistant (DBCA).
c:\>dbca
Select the "Create Database" option and click the "Next" button.
Select the "Create a database with default configuration" option. Enter the container database name (cdbrac), pluggable database name (pdbrac) and administrator password. Click the "Next" button.

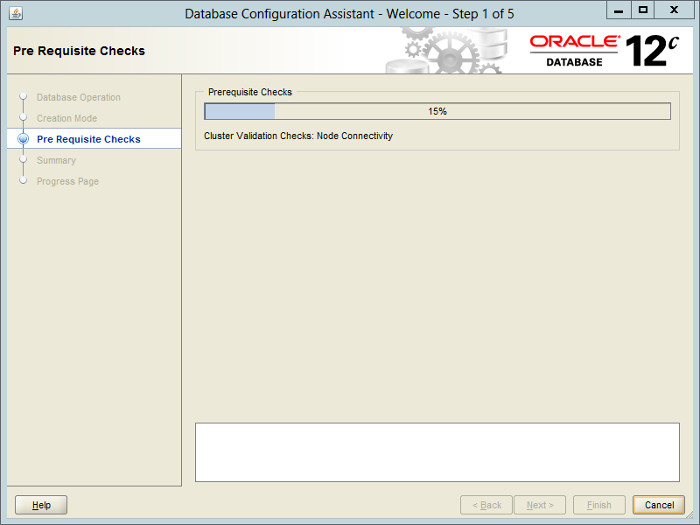
Wait for the prerequisite checks to complete. If there are any problems either fix them, or check the "Ignore All" checkbox and click the "Next" button.
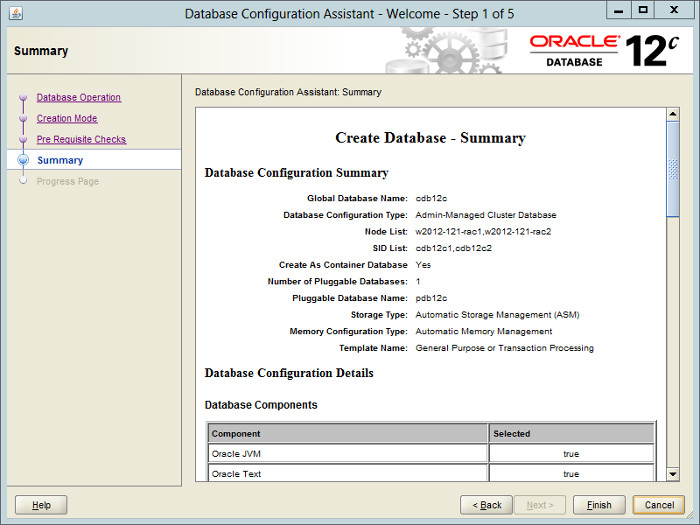
If you are happy with the summary information, click the "Finish" button.
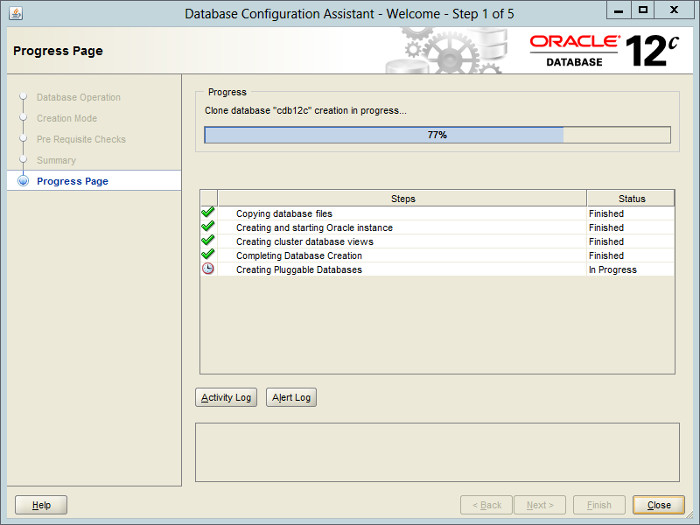
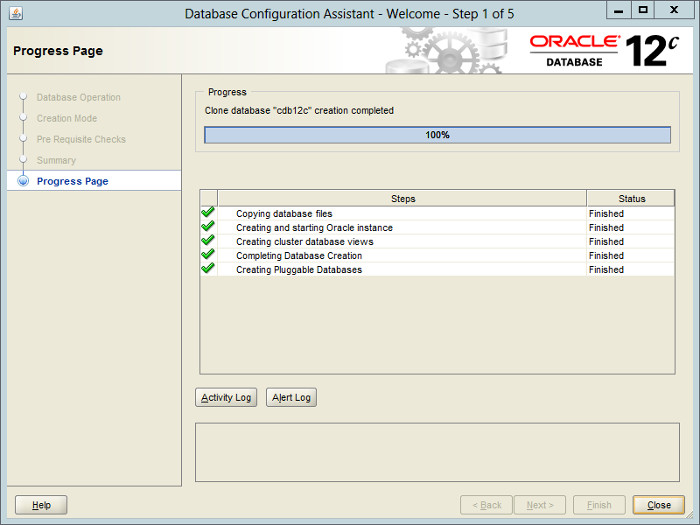
Wait while the database creation takes place.
If you want to modify passwords, click the "Password Management" button. When finished, click the "Exit" button.
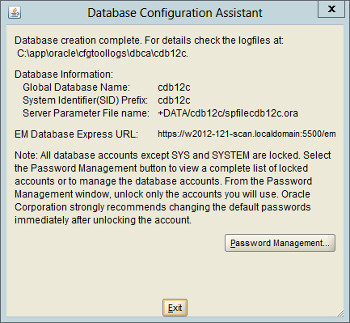
Click the "Close" button to exit the DBCA.
The RAC database creation is now complete.
Check the Status of the RAC
There are several ways to check the status of the RAC. The srvctl utility shows the current configuration and status of the RAC database.
C:\>srvctl config database -d cdb12c
Database unique name: cdb12c
Database name: cdb12c
Oracle home: C:\app\oracle\product\12.1.0.1\db_1
Oracle user: nt authority\system
Spfile: +DATA/cdb12c/spfilecdb12c.ora
Password file: +DATA/cdb12c/orapwcdb12c
Domain:
Start options: open
Stop options: immediate
Database role: PRIMARY
Management policy: AUTOMATIC
Server pools: cdb12c
Database instances: cdb12c1,cdb12c2
Disk Groups: DATA
Mount point paths:
Services:
Type: RAC
Start concurrency:
Stop concurrency:
Database is administrator managed

C:\>

C:\>srvctl status database -d cdb12c
Instance cdb12c1 is running on node w2012-121-rac1
Instance cdb12c2 is running on node w2012-121-rac2

C:\>
The V$ACTIVE_INSTANCES view can also display the current status of the instances.
C:\>sqlplus / as sysdba

SQL*Plus: Release 12.1.0.1.0 Production on Mon Jul 22 23:12:22 2013

Copyright (c) 1982, 2013, Oracle.  All rights reserved.


Connected to:
Oracle Database 12c Enterprise Edition Release 12.1.0.1.0 - 64bit Production
With the Partitioning, Real Application Clusters, Automatic Storage Management,
Advanced Analytics and Real Application Testing options

SQL> SELECT inst_name FROM v$active_instances;

INST_NAME
------------------------------------------------------------
W2012-121-RAC1:cdb12c1
W2012-121-RAC2:cdb12c2

SQL>
For more information see:
- Oracle Grid Infrastructure Installation Guide 12c Release 1 (12.1) for Microsoft Windows x64 (64-Bit)
- Oracle Real Application Clusters Installation Guide 12c Release 1 (12.1) for Microsoft Windows x64 (64-Bit)
- Oracle Database 12c Release 1 (12.1.0.1) RAC On Oracle Linux 6 Using VirtualBox
Hope this helps. Regards Tim...