8i | 9i | 10g | 11g | 12c | 13c | 18c | 19c | 21c | 23c | Misc | PL/SQL | SQL | RAC | WebLogic | Linux
Home » Articles » Linux » Here
Docker : Using JFrog Platform as a Docker Registry
This article demonstrates how to use JFrog Platform as a Docker registry, also known as a container registry. A Docker registry is a repository to store and distribute Docker images.
- Create a Docker Registry Manually
- Create a Docker Registry Using Terraform
- Logging into the Registry
- Pushing Images to the Registry
- Pulling Images From the Registry
Related articles.
Create a Docker Registry Manually
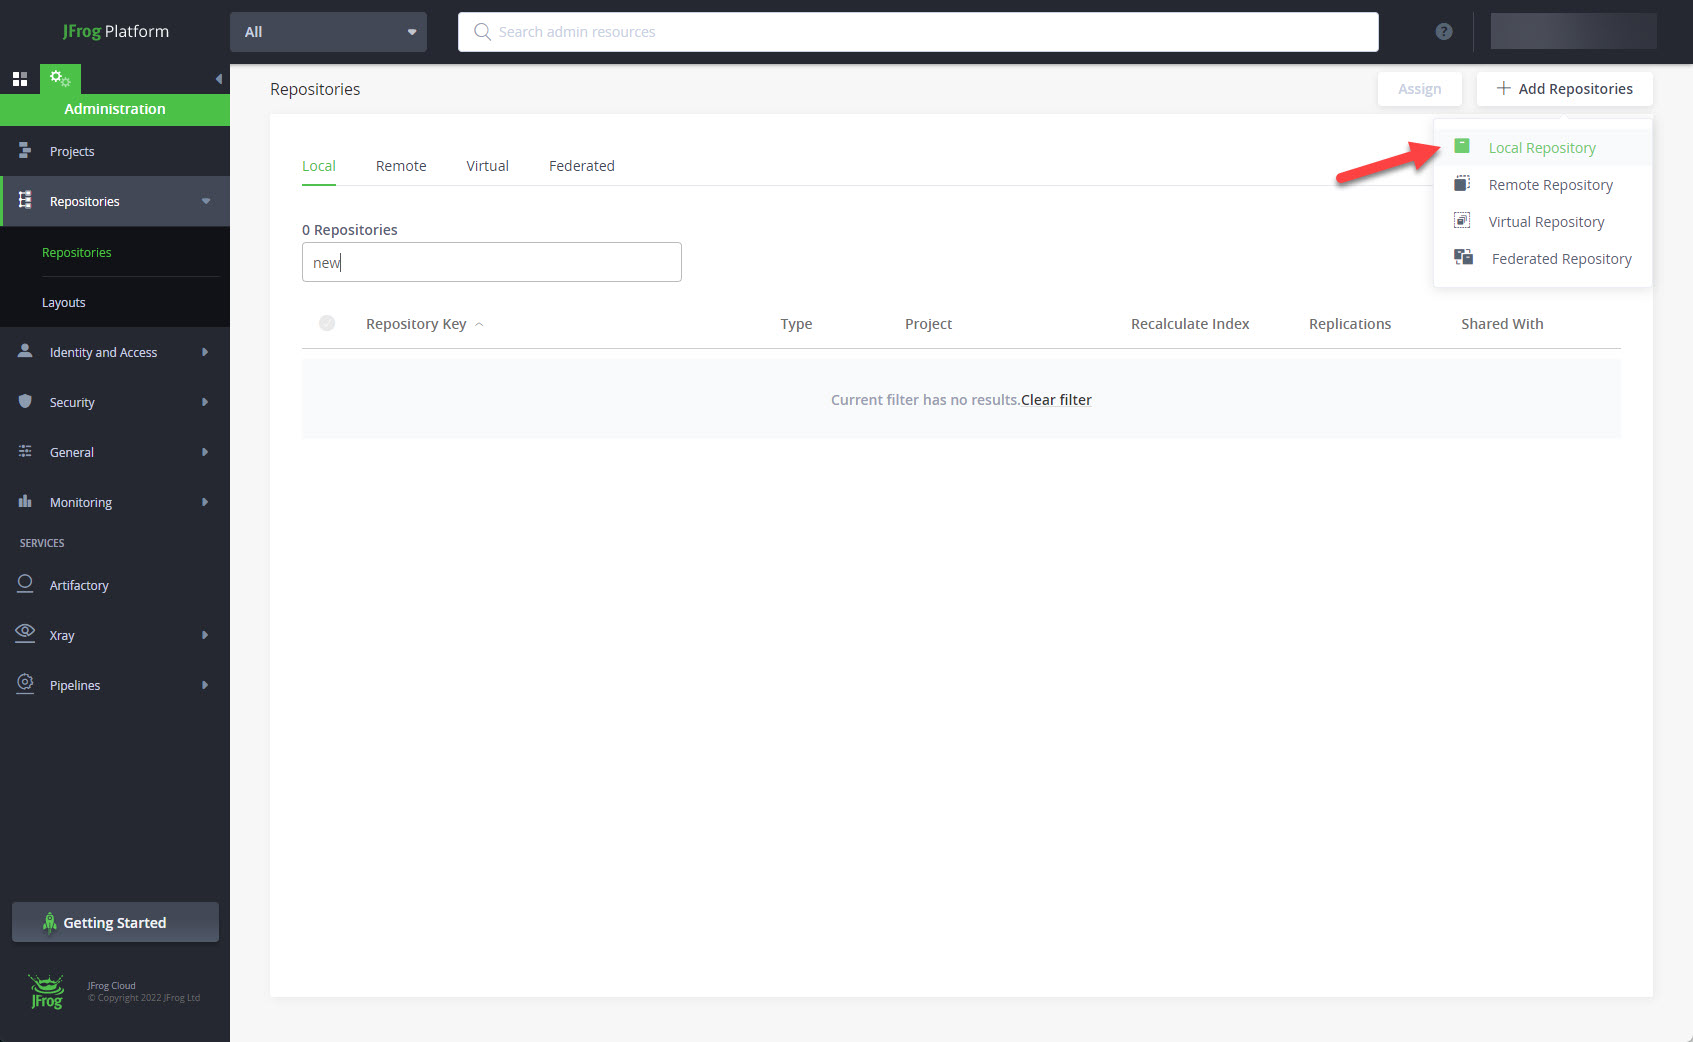
Log into JFrog Platform. Expand the "Repositories" item and click the "Repositories" link.

Click on the "+ Add Repositories" button, and select the "Local Repository" option.
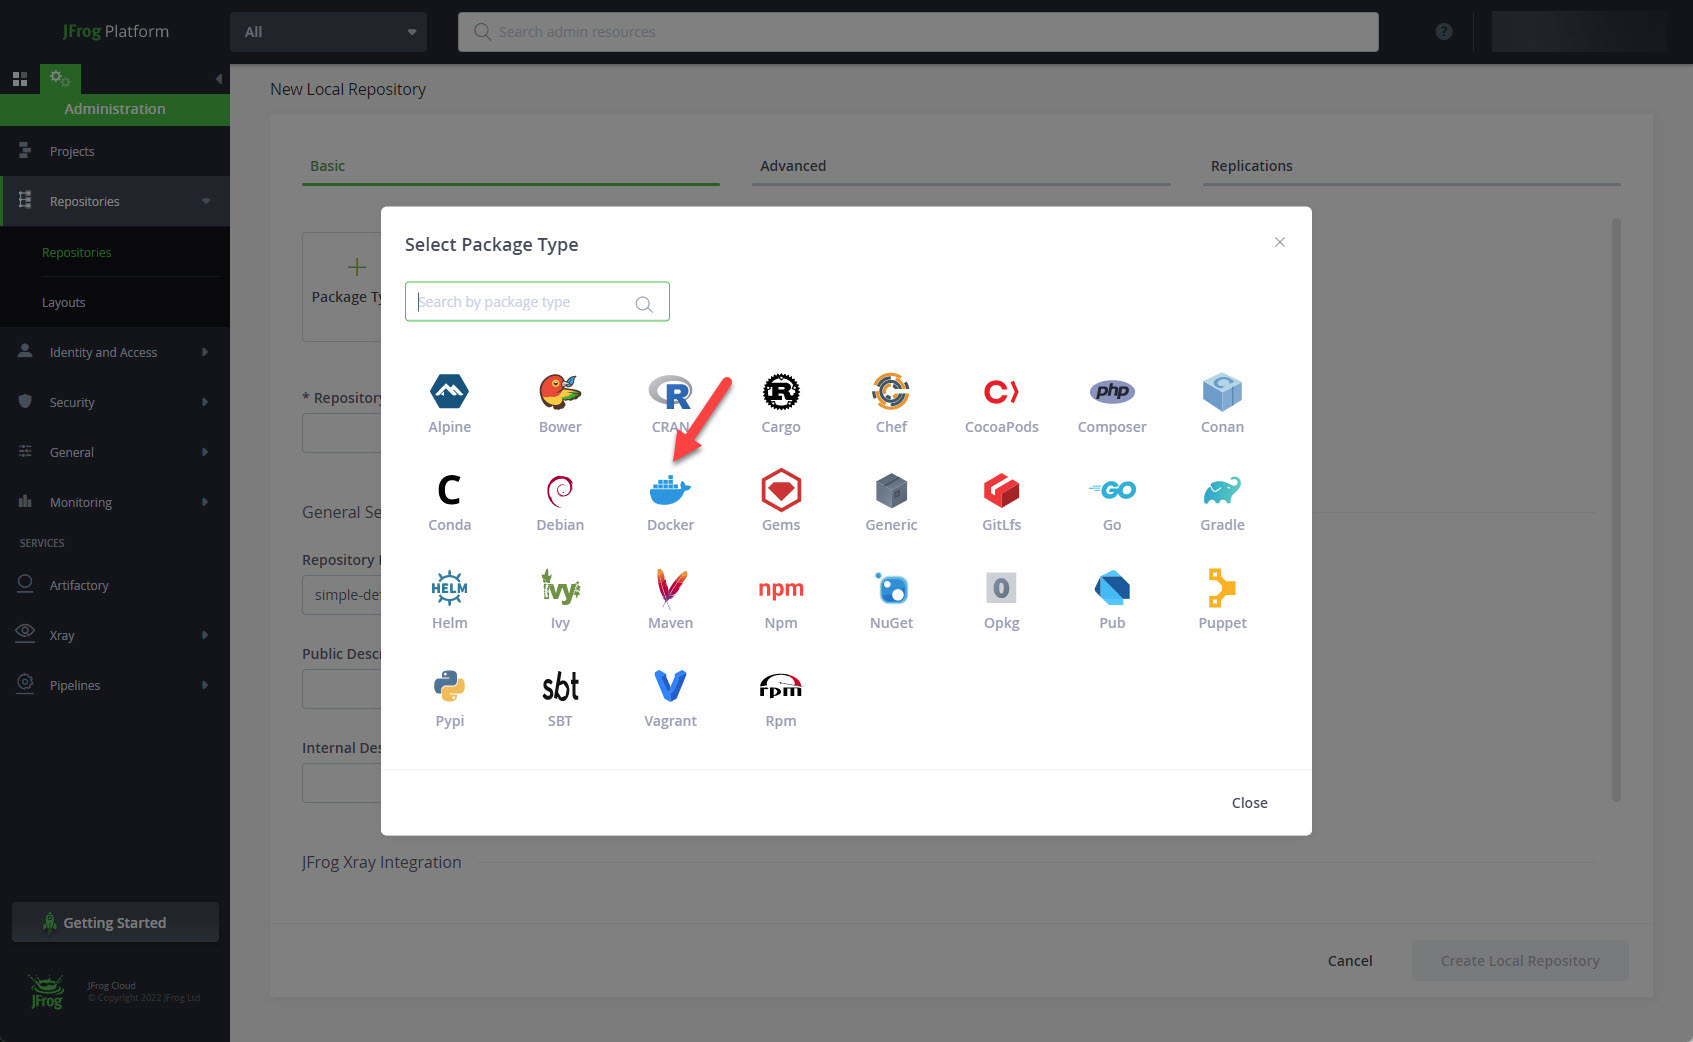
Click the "Docker" package type.
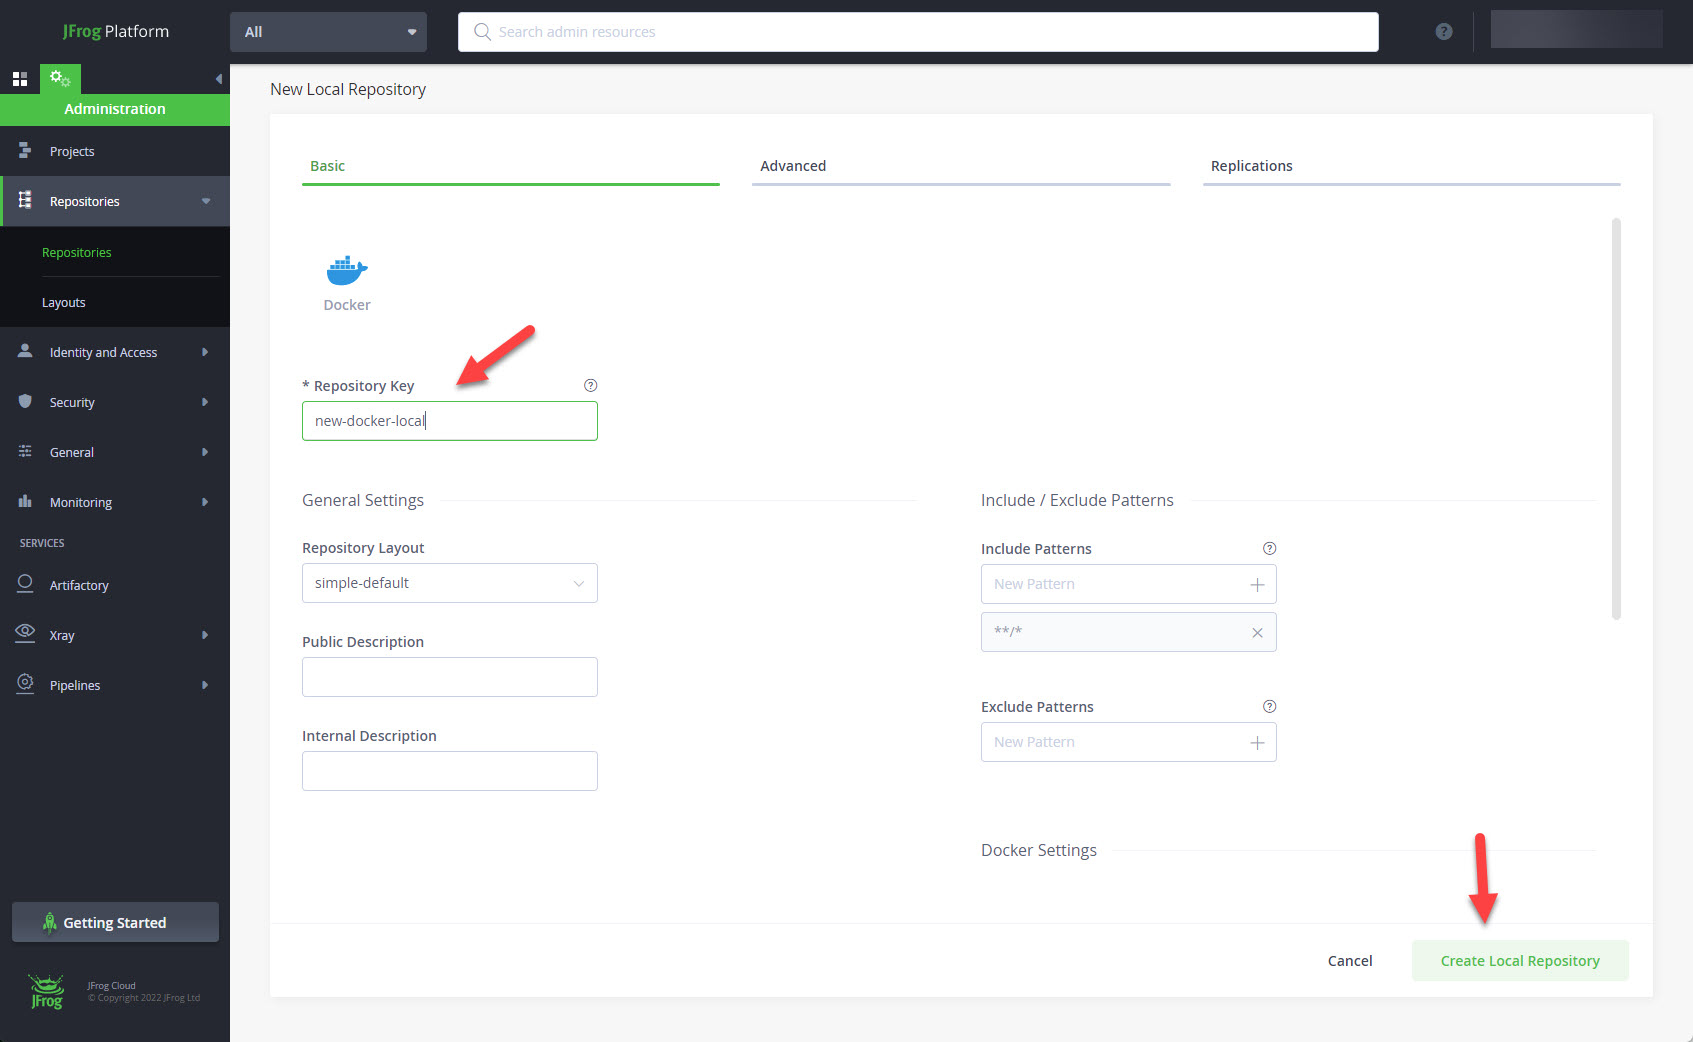
Enter a Repository Key (name) and click the "Create Local Repository" button.
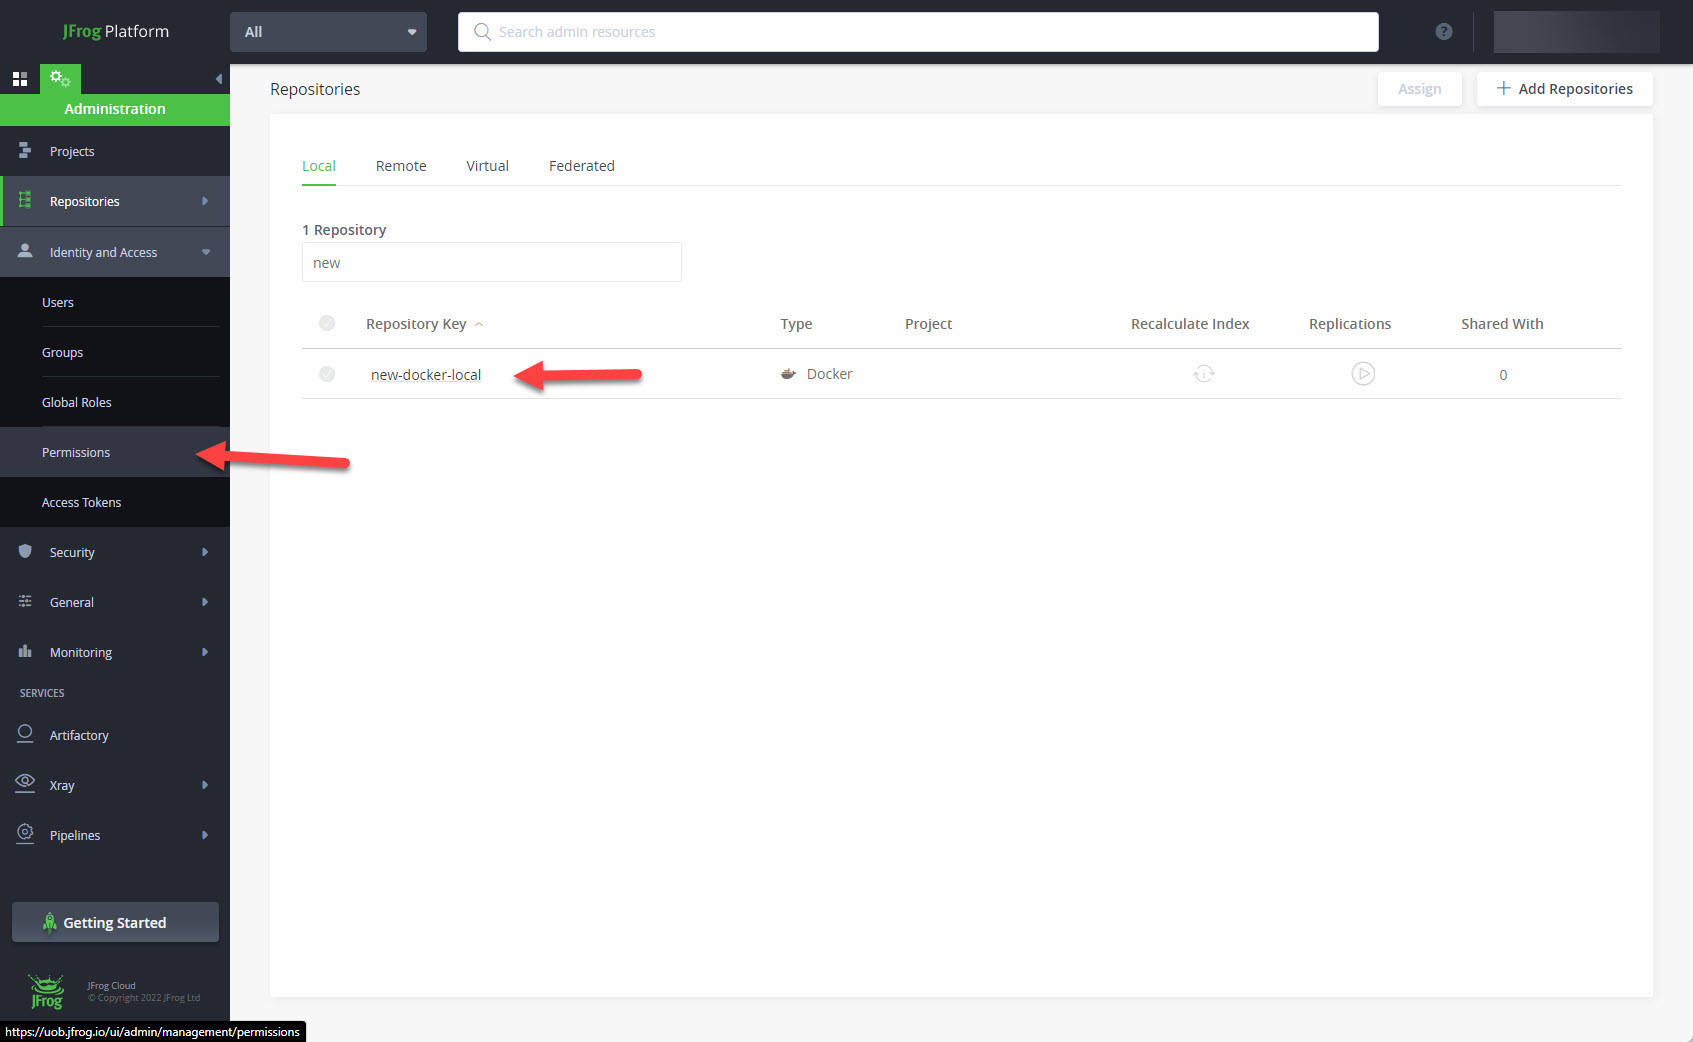
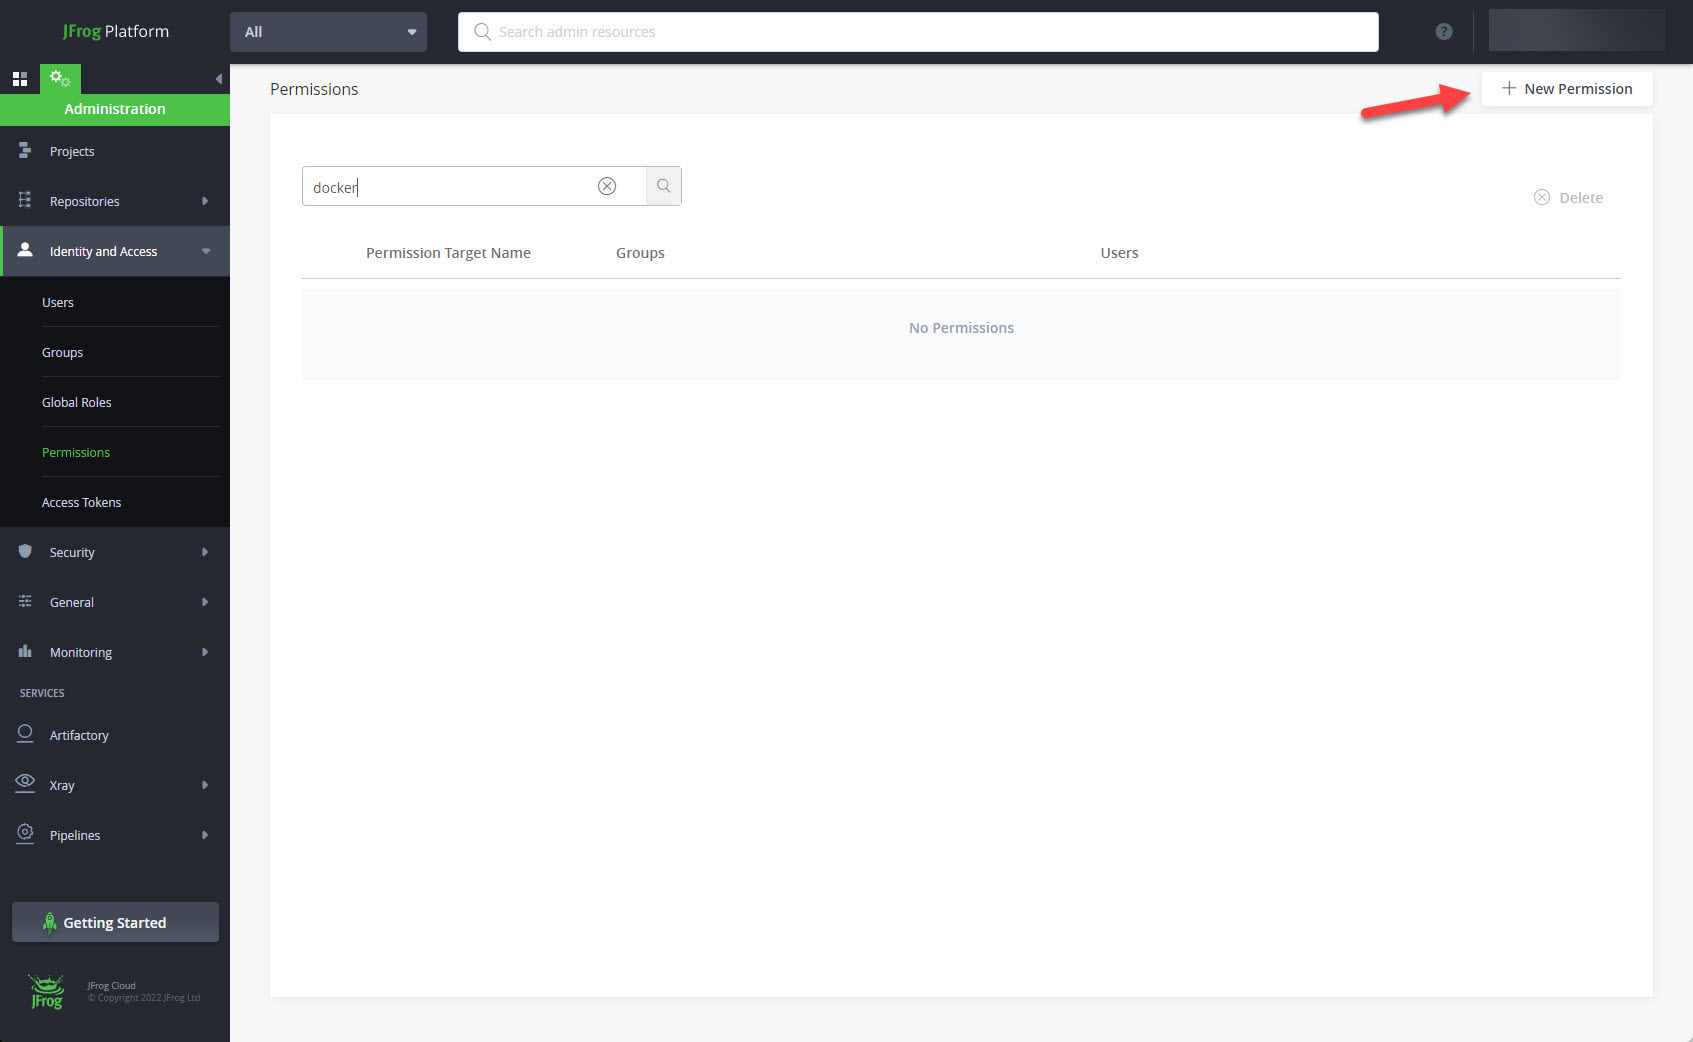
The new repository is in the list of repositories. Expand the "Identity and Access" item and click on the "Permissions" link.
Click on the "+ New Permission" button.
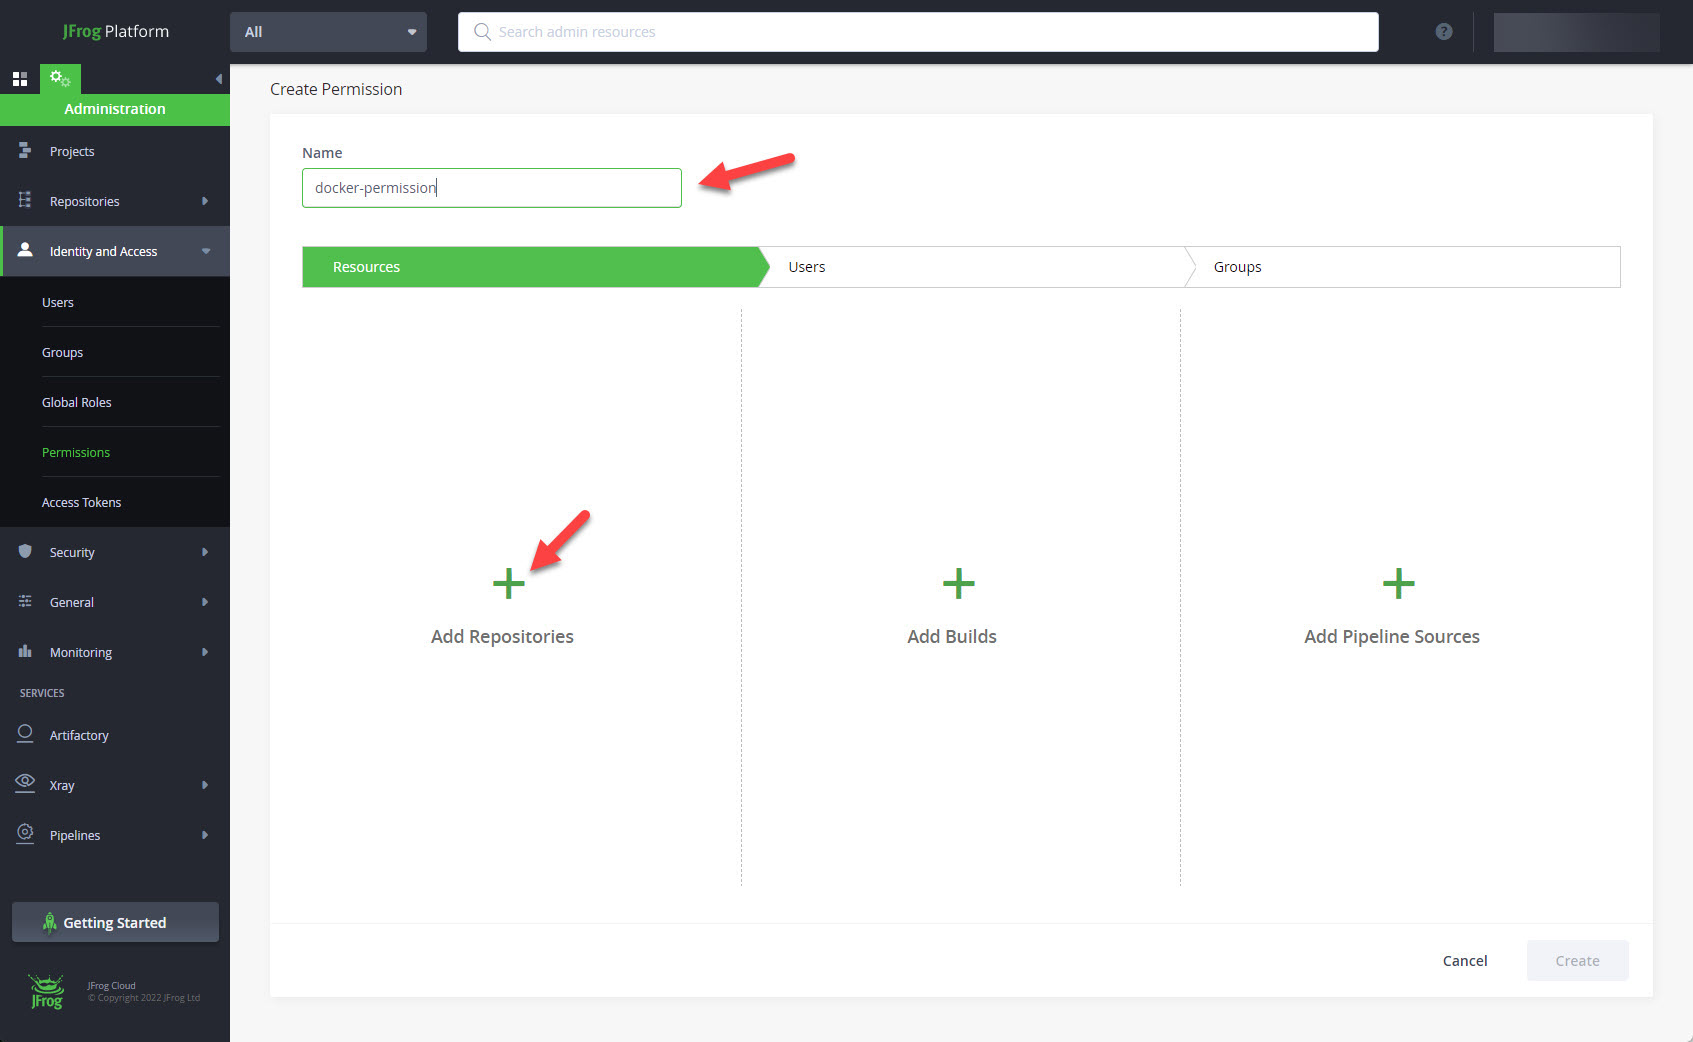
Enter the permission name and click on the "+ Add Repositories" button.
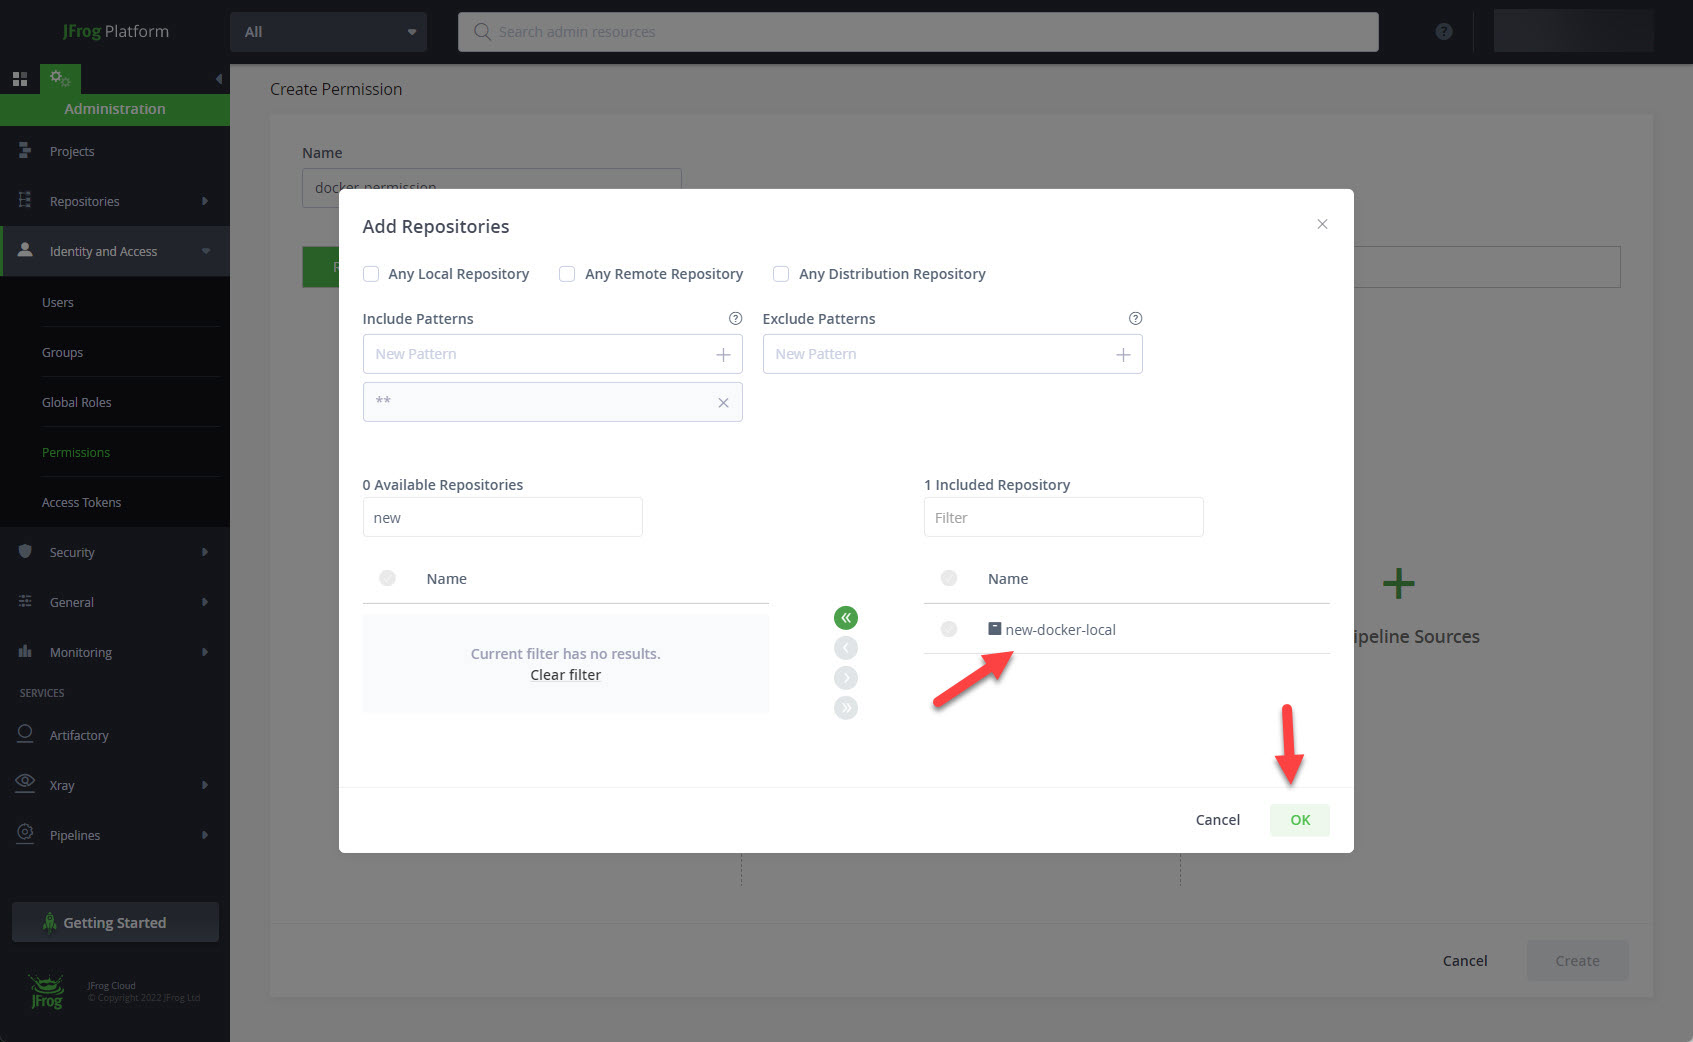
Drag the docker repository to the right hand side and click the "OK" button.
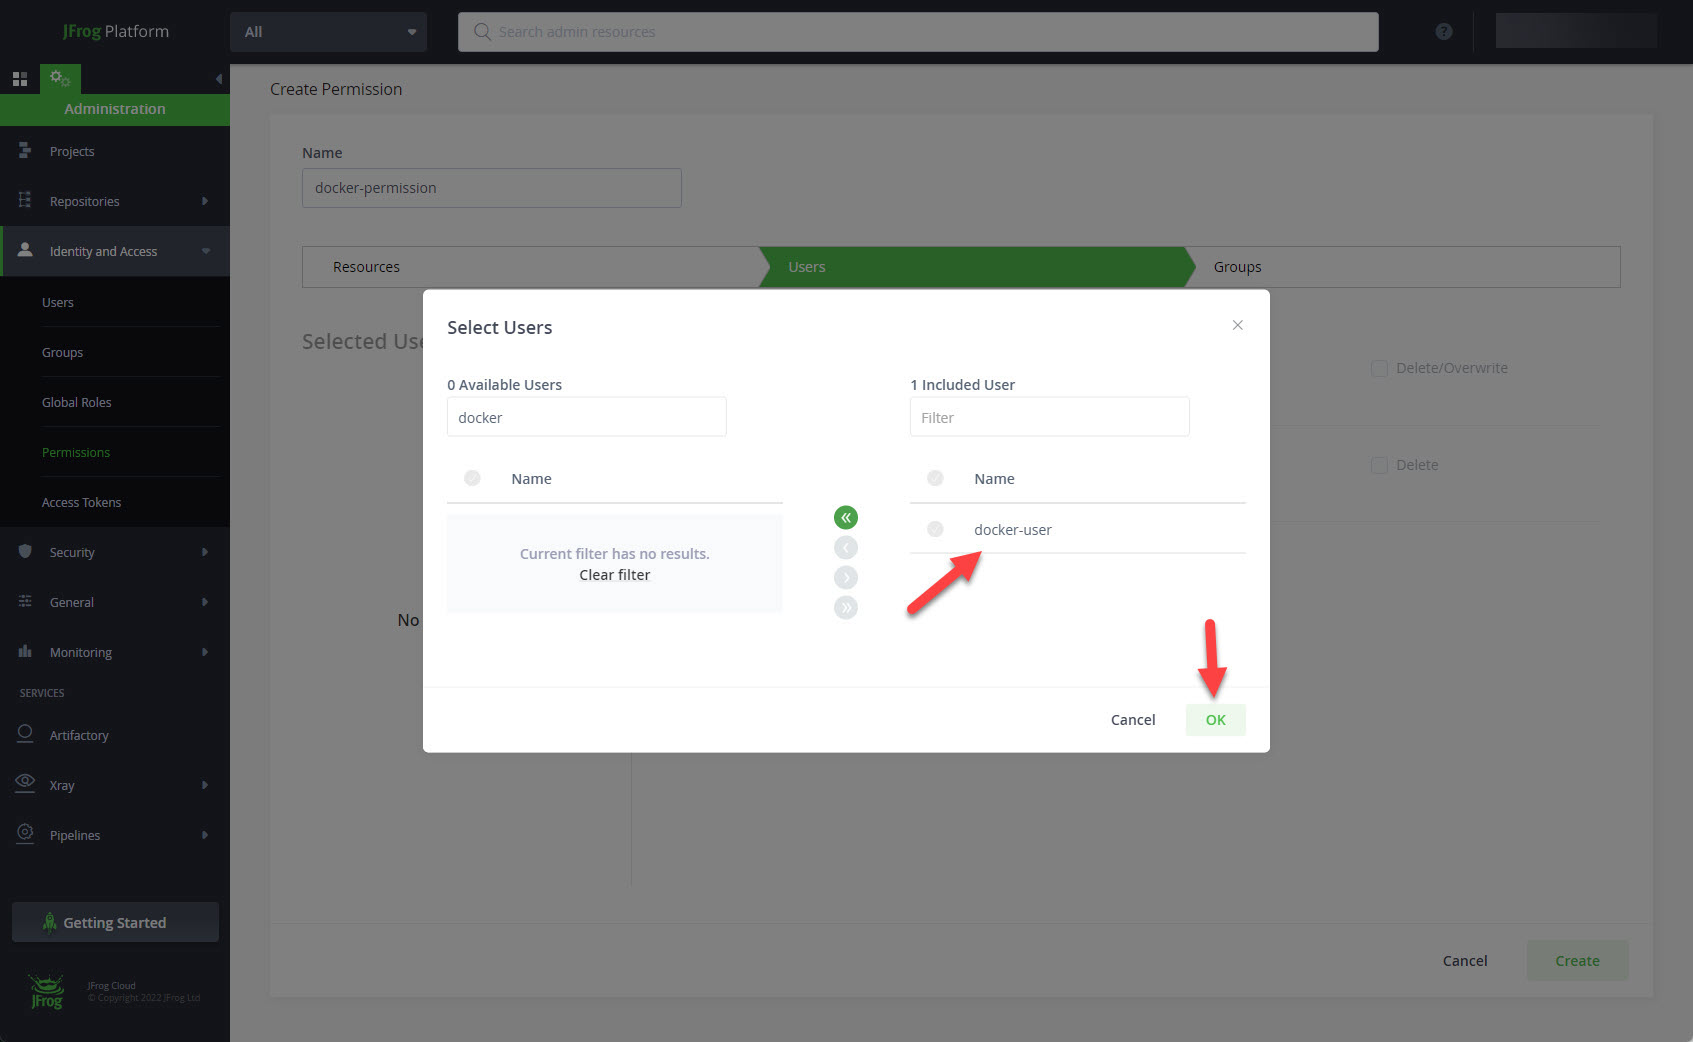
Click on the "Users" tab.

Click the "+" next to "Selected Users".
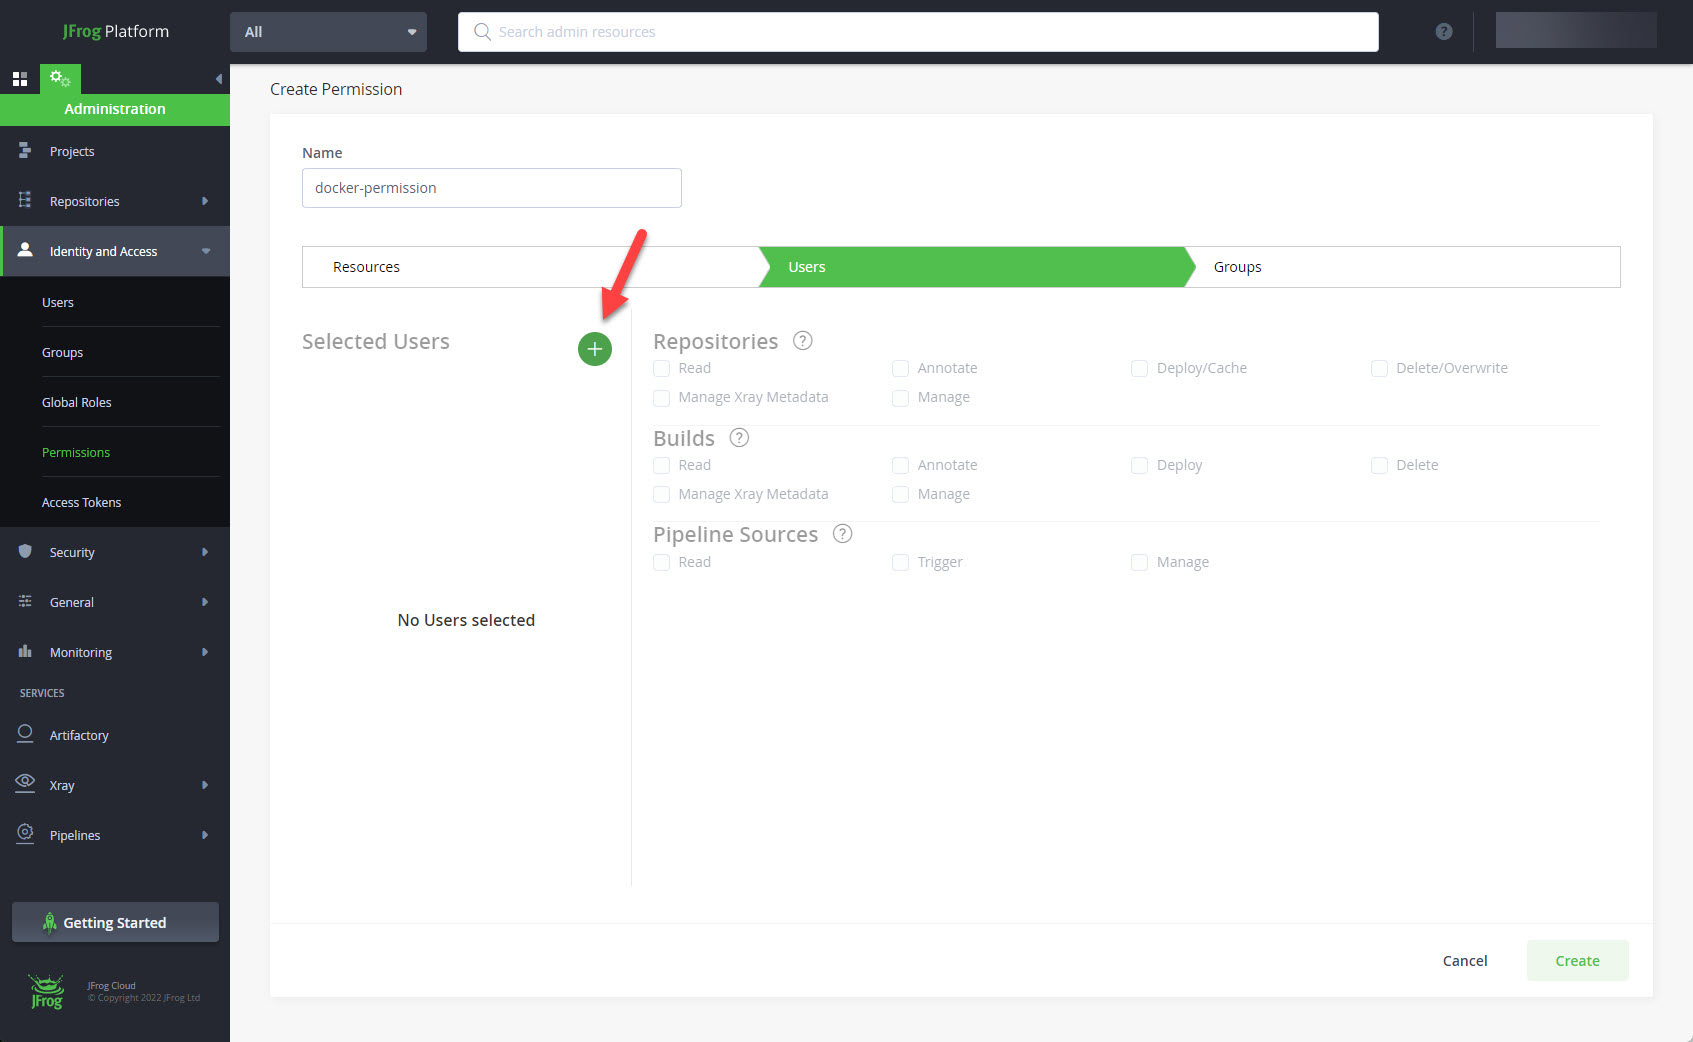
Drag your user across to the right and click the "OK" button.
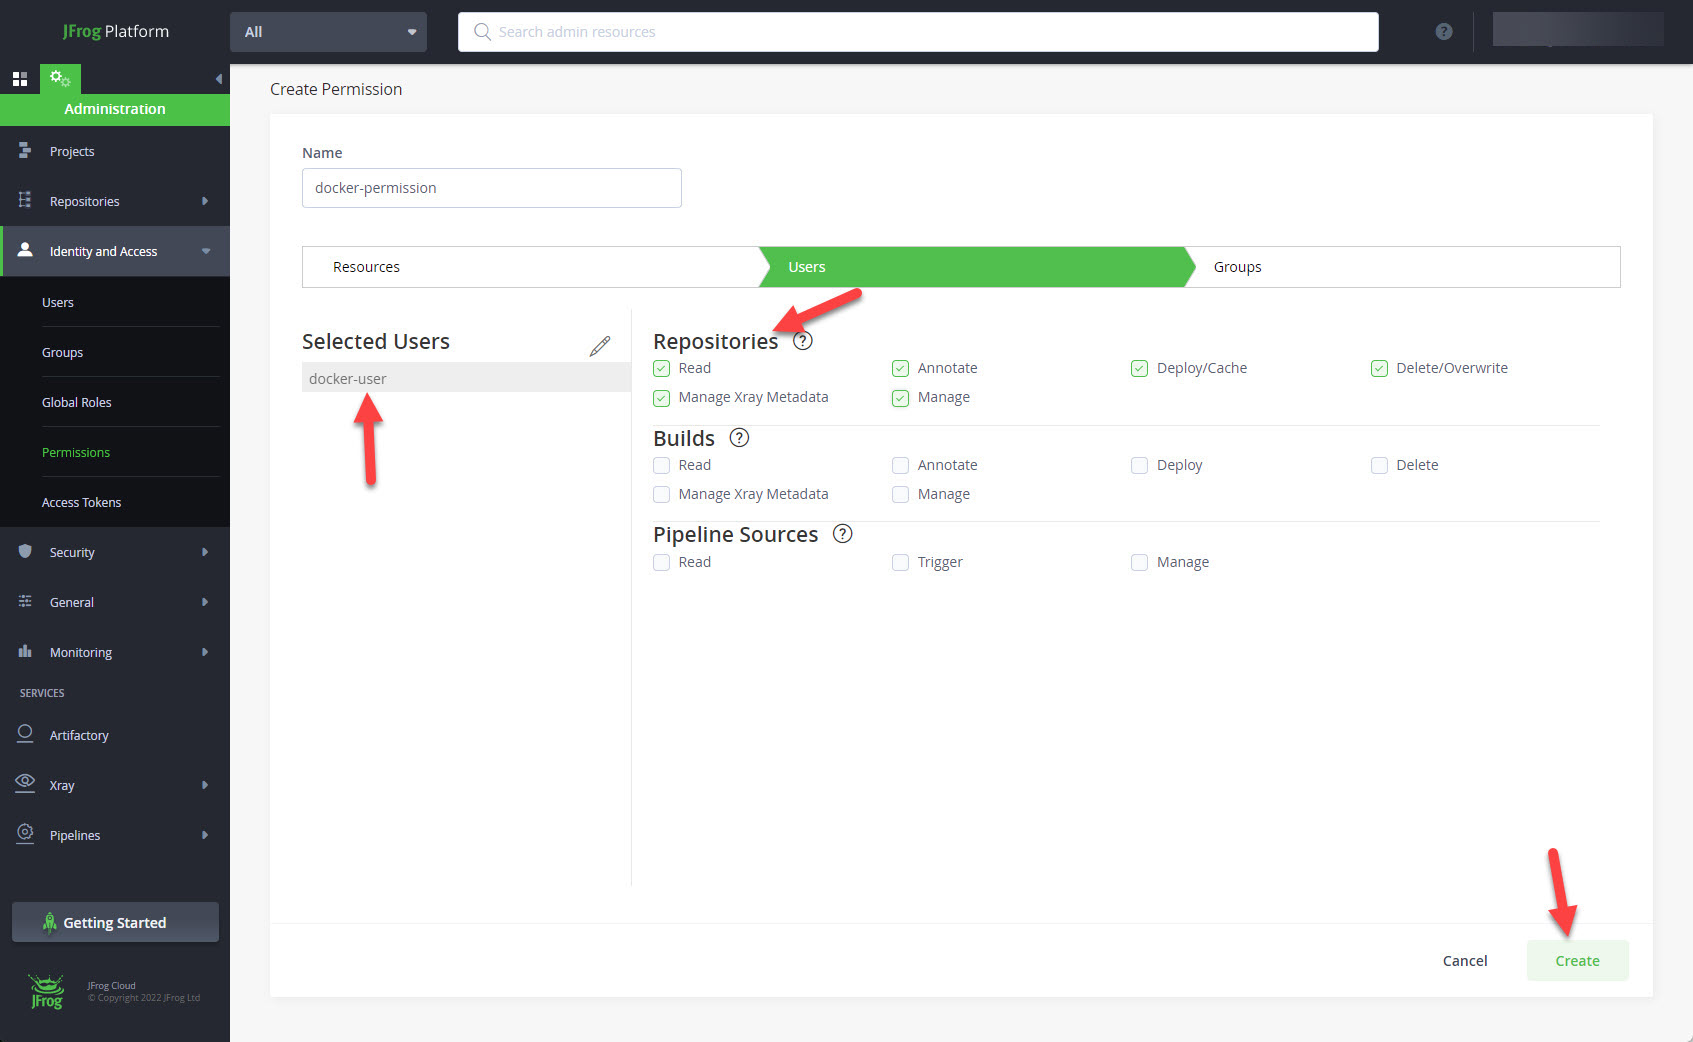
With the selected user in place, add the repository permissions you require, and click the "Create" button.
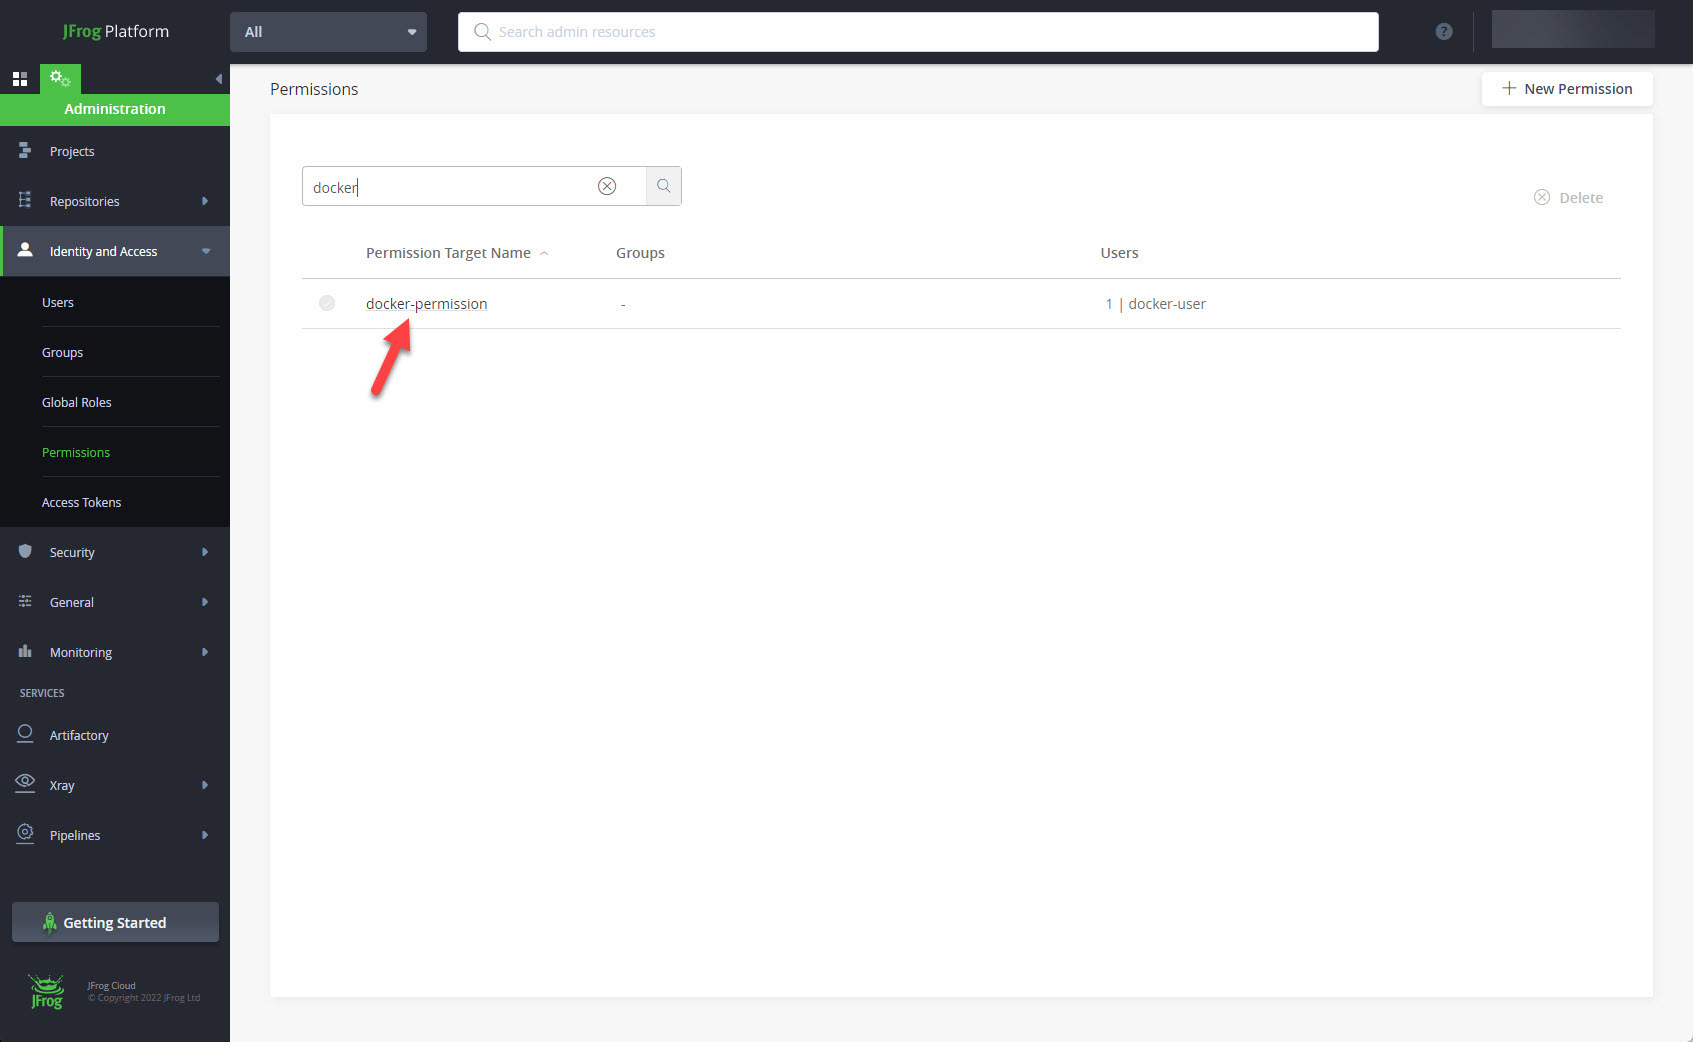
The new permission is now listed on the permissions screen.
Create a Docker Registry Using Terraform
If we were building this repository with Terraform, it's as simple as this.
resource "artifactory_local_docker_v2_repository" "new-docker-local" {
  key             = "new-docker-local"
  max_unique_tags = 0
  xray_index      = true
}

resource "artifactory_permission_target" "docker-permissions" {
  name = "docker-permissions"

  repo {
    includes_pattern = ["**"]
    repositories     = ["new-docker-local"]

    actions {
      groups {
        name        = "docker-user"
        permissions = ["read", "write", "annotate", "delete", "managedXrayMeta", "manage"]
      }
    }
  }
}
Logging into the Registry
Before we can use the container registry, we need to login from our server.
# Docker
docker login my-company.jfrog.io

# Podman
podman login my-company.jfrog.io
We are prompted for a username and password. Alternatively, we can supply the credentials on the command line.
# Docker
docker login -u docker-user -p mypassword my-company.jfrog.io
docker login --username docker-user --password mypassword my-company.jfrog.io

# Podman
podman login -u docker-user -p mypassword my-company.jfrog.io
podman login --username docker-user --password mypassword my-company.jfrog.io
The credentials are base 64 encoded and cached.
Pushing Images to the Registry
Once we have built an image we can push it to the registry. Make sure you have logged into the registry, as described above.
We need to tag the image we want to push to the registry. The tag includes the registry details.
export IMAGE_ID=3ada03ad3d04
export IMAGE_REGISTRY=new-docker-local
export IMAGE_NAME=my-image
export IMAGE_VERSION=latest


# Docker
docker tag ${IMAGE_ID} my-company.jfrog.io/${IMAGE_REGISTRY}/${IMAGE_NAME}:${IMAGE_VERSION}

# Podman
podman tag ${IMAGE_ID} my-company.jfrog.io/${IMAGE_REGISTRY}/${IMAGE_NAME}:${IMAGE_VERSION}
Once tagged, we can push the image to the registry.
# Docker
docker push my-company.jfrog.io/${IMAGE_REGISTRY}/${IMAGE_NAME}:${IMAGE_VERSION}

# Podman
podman push my-company.jfrog.io/${IMAGE_REGISTRY}/${IMAGE_NAME}:${IMAGE_VERSION}
Pulling Images From the Registry
On the server that needs to use the images, we need to pull the images from the registry. Make sure you have logged into the registry, as described above.
export IMAGE_REGISTRY=new-docker-local
export IMAGE_NAME=my-image
export IMAGE_VERSION=latest


# Docker
podman pull uob.jfrog.io/${IMAGE_REGISTRY}/${IMAGE_NAME}:${IMAGE_VERSION}

# Podman
podman pull uob.jfrog.io/${IMAGE_REGISTRY}/${IMAGE_NAME}:${IMAGE_VERSION}
We can now use the image to create a container in the normal way.
For more information see:
Hope this helps. Regards Tim...