8i | 9i | 10g | 11g | 12c | 13c | 18c | 19c | 21c | 23ai | Misc | PL/SQL | SQL | RAC | WebLogic | Linux
Oracle WebLogic Server (WLS) 12cR1 (12.1.1) Development-Only Installation on Oracle Linux 5 and 6
This article presents a brief overview of installing the development-only version of Oracle WebLogic Server (WLS) 12cR1 (12.1.1) on Oracle Linux 5 and 6.
Related articles.
At the time of writing, WebLogic 12c Release 1 was not supported on Oracle Linux 6.
Assumptions
This article assumes you have an existing server (real or virtual) with either Oracle Linux 5.x or 6.x installed on it. For instruction on how to do this check out the following articles.
- Oracle Linux 5 (OL5) Installation : I did the basic installation with no extra package groups for this installation.
- Oracle Linux 6 (OL6) Installation : I picked the "Desktop" option for this installation, so I would have a graphical interface without having to select separate package groups.
Everything in the installation will be 64-bit.
Software
Download the Weblogic Server 12c software from Oracle Technology Network.
- Java Development Kit (I used 7u2 Linux64 RPM)
- JRockit (Use this in place of SUN JDK for production servers)
- WebLogic Server 12c Release 1 - zip file
Setup
The following actions should be performed by the "root" user.
Make sure the "/etc/hosts" file contains correct entries for both the "localhost" and real host names.
127.0.0.1      localhost localhost.localdomain localhost4 localhost4.localdomain4
192.168.0.163  ol6-wls12.localdomain ol6-wls12
Install the JDK.
# rpm -Uvh jdk-7u2-linux-x64.rpm
Create a new group and user.
groupadd -g 1000 oinstall
useradd -u 1100 -g oinstall oracle
passwd oracle
Create the directories in which the Oracle software will be installed.
mkdir -p /u01/app/oracle/middleware
chown -R oracle:oinstall /u01
chmod -R 775 /u01/
Append the following entries into the "/home/oracle/.bash_profile" file.
MW_HOME=/u01/app/oracle/middleware; export MW_HOME
WLS_HOME=$MW_HOME/wlserver; export WLS_HOME
JAVA_HOME=/usr/java/jdk1.7.0_02; export JAVA_HOME
PATH=$JAVA_HOME/bin:$PATH; export PATH
# JDK 7 Requirement
USER_MEM_ARGS="-Xms32m -Xmx200m -XX:MaxPermSize=350m"
Installation
The following actions should be performed by the "oracle" user.
Unzip the software into the middleware directory.
$ cd /host/software/oracle/WebLogic
$ unzip -d /u01/app/oracle/middleware wls1211_dev.zip
The installation instructions are present in the "README.txt" file now located in the middleware directory.
Run the following script from the middleware directory.
$ cd /u01/app/oracle/middleware
$ ./configure.sh
This should end with a "BUILD SUCCESSFUL" message.
Run the environment script for the current shell.
$ . $WLS_HOME/server/bin/setWLSEnv.sh
Create a domain, outside the middleware directory. In this case the domain will be called "mydomain".
$ mkdir -p /u01/app/oracle/mydomain
$ cd /u01/app/oracle/mydomain
$ export JAVA_OPTIONS="$JAVA_OPTIONS -Dweblogic.management.allowPasswordEcho=true"
$ $JAVA_HOME/bin/java $JAVA_OPTIONS -Xmx1024m -XX:MaxPermSize=128m weblogic.Server
When prompted, say "y" to the default configuration and boot, then provide your preferred login username and password details.
The amendment to the JAVA_OPTIONS environment variable is necessary to prevent the, "Server is Running in Development Mode and Native Library(terminalio) to read the password securely from commandline is not found.", error.
Once complete, we need to copy the following files as the "root" user. This is a requirement because we are using version 7 of the JDK.
# mkdir -p $JAVA_HOME/jre/lib/endorsed
# cp $MW_HOME/modules/javax.annotation_1.0.0.0_1-1.jar $JAVA_HOME/jre/lib/endorsed
# cp $MW_HOME/modules/javax.xml.bind_2.2.3.jar $JAVA_HOME/jre/lib/endorsed
# cp $MW_HOME/modules/javax.xml.ws_2.2.1.jar $JAVA_HOME/jre/lib/endorsed
The "mydomain" directory now contains a script that can be used to start the server. Remember to use the "&" if you want access to the commandline to be returned.
$ cd /u01/app/oracle/mydomain
$ ./startWebLogic.sh &
Post-Installation
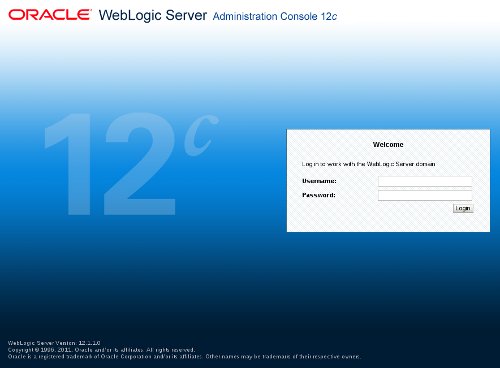
Once the server is started you can access the administrator console using the "http://hostname:7001/console" URL. Log in using the username and password provided in the previous step.

The following scripts are useful.
$ # Start NodeManager
$ nohup $WLS_HOME/server/bin/startNodeManager.sh > /dev/null 2>&1 &


$ # Start WebLogic
$ nohup $MW_HOME/user_projects/domains/mydomain/startWebLogic.sh > /dev/null 2>&1 &
$ # or
$ nohup $MW_HOME/user_projects/domains/mydomain/bin/startWebLogic.sh > /dev/null 2>&1 &

$ # Stop WebLogic
$ $MW_HOME/user_projects/domains/mydomain/bin/stopWebLogic.sh


$ # Start Managed Server
$ nohup $MW_HOME/user_projects/domains/mydomain/bin/startManagedWebLogic.sh AdminServer > /dev/null 2>&1 &

$ # Stop Managed Server
$ $MW_HOME/user_projects/domains/mydomain/bin/stopManagedWebLogic.sh AdminServer


$ # Start the configuration wizard
$ $WLS_HOME/common/bin/config.sh
For more information see:
Hope this helps. Regards Tim...